
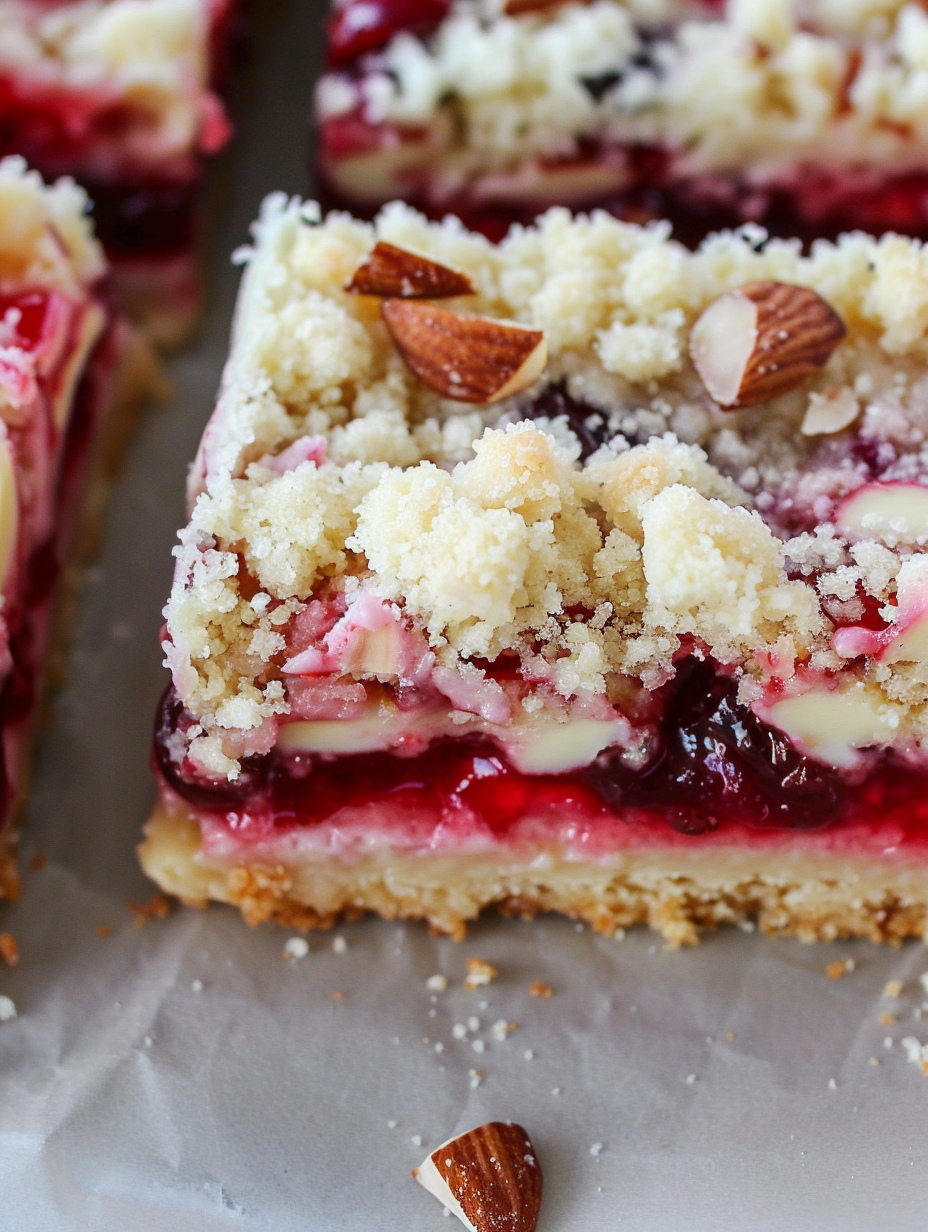
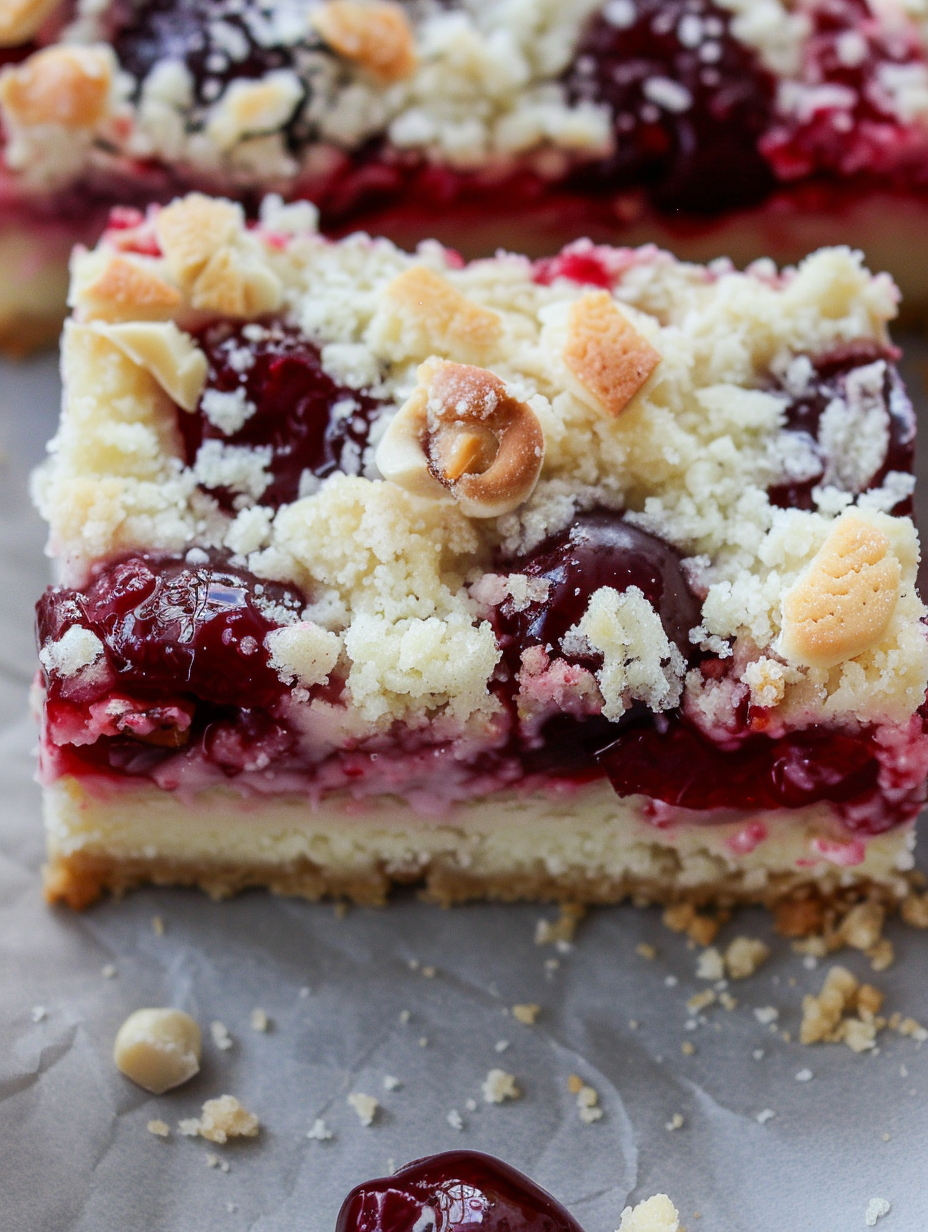
Christmas Cheesecake Bars

Sweet buttery cookie crust topped with creamy cheesecake, cherry filling, and crunchy almond crumble — a festive, make-ahead holiday treat.
Why You'll Love This Recipe
- Ready in about 1 hour 30 minutes from start to finish, with most active time under 30 minutes; most of the time is baking and chilling, perfect for multitasking.
- Uses a single bowl for the filling and a simple sugar cookie mix for the base; pantry-friendly and easy to source ingredients.
- Make-ahead friendly: chill overnight to set and slice cleanly, which makes these ideal for holiday planning and transporting to gatherings.
- Textural contrast with a buttery press-in crust, smooth cream cheese layer, and crunchy almond crumble that makes each bite interesting.
- Customizable topping—swap cherries for raspberry or blueberry pie filling, or add chocolate drizzle for an extra festive touch.
- Serves a crowd when cut into small squares, and the 8x8 pan yields about 16 bite-sized pieces that are great for parties.
I remember bringing a pan to a neighborhood cookie exchange and watching people come back for seconds. My nephew declared them the best part of dessert and my neighbor asked if I would make them for her office party the next week. These bars have become my little holiday calling card because they look impressive but are truly simple to assemble, leaving time for the rest of holiday prep.
Ingredients
- Sugar cookie mix (1 package, 8.5 ounces): Use a trusted brand such as Pillsbury or Betty Crocker for consistent results. The mix creates a tender, buttery press-in crust and provides the crumble base; choose regular, not sugar-free.
- Butter, cold (4 tablespoons): Cold unsalted butter cut into small cubes helps you achieve a sandy crumble for both the crust and streusel. If you prefer salted, reduce any added salt elsewhere.
- Cream cheese (8 ounces), softened: Full-fat cream cheese gives the creamiest texture. Bring it to room temperature to avoid lumps; Philadelphia is a reliable brand for a smooth filling.
- Granulated sugar (1/4 cup): Sweetens the cream cheese mixture without overpowering the fruit topping; use regular white sugar for clean sweetness.
- All-purpose flour (1 tablespoon): A small amount stabilizes the cream cheese layer so it holds together when sliced.
- Vanilla extract (1/2 teaspoon): Adds aromatic depth to the cream cheese layer; pure vanilla is preferable for the best flavor.
- Egg (1 large): Binds and sets the filling; use a fresh large egg at room temperature for even incorporation.
- Cherry pie filling (3/4 can): Approximately three quarters of a standard 21 ounce can creates jewel-like pockets across the top; use a quality brand or homemade for brighter flavor.
- Sliced almonds (1/3 cup): Stir into the reserved crumble for crunch and a festive look; lightly toasted almonds add an extra nutty depth.
Instructions
Preheat and prepare the pan: Preheat the oven to 350 degrees Fahrenheit. Spray an 8 x 8-inch baking pan with non-stick spray or line it with parchment, leaving an overhang for easy removal. Proper pan preparation prevents sticking and helps the bars release cleanly. Make the crumble mixture: In a small bowl, combine the sugar cookie mix and cold cubed butter. Use a fork or a pastry cutter to work the butter into the dry mix until the texture resembles coarse crumbs. Reserve 3/4 cup of this mixture and place it in the refrigerator while you press the rest into the pan. Cold butter ensures a tender, slightly crisp crust once baked. Press and blind-bake the crust: Press the remaining cookie crumb mixture evenly into the bottom of the prepared pan using the back of a measuring cup for an even surface. Bake for 10 minutes to set the crust. Transfer the pan to the refrigerator to cool quickly for easier assembly; a warm crust will not hold the filling evenly. Prepare the cream layer: Beat the softened cream cheese with 1/4 cup sugar, 1 tablespoon flour, 1/2 teaspoon vanilla, and the egg until the mixture is completely smooth and slightly aerated. Scrape the bowl to eliminate lumps. The small amount of flour helps prevent cracking and improves sliceability. Assemble the layers: Spread the cream cheese mixture over the cooled crust in an even layer, smoothing with a spatula. Spoon the cherry pie filling over the cream cheese and gently spread so the cherries are distributed but some of the cream cheese still shows through; this creates attractive marbling and pockets of bright fruit. Add the almond crumble: Stir the sliced almonds into the reserved crumble mixture. Sprinkle this mixture evenly over the cherry layer to create a crunchy, nutty topping. This topping will toast as the bars bake and provide a lovely contrast to the creamy center. Bake until set: Bake the assembled pan in the 350 degree oven for about 40 minutes. You are aiming for the center to be mostly set with a slight jiggle; the edges will be lightly golden. Overbaking will dry the cream layer so check at 35 minutes and add time as needed. Cool and chill: Cool the pan on a wire rack for 30 minutes, then transfer to the refrigerator for at least 2 hours or until thoroughly chilled and firm. Chilling allows clean slicing and lets flavors meld, improving texture and taste.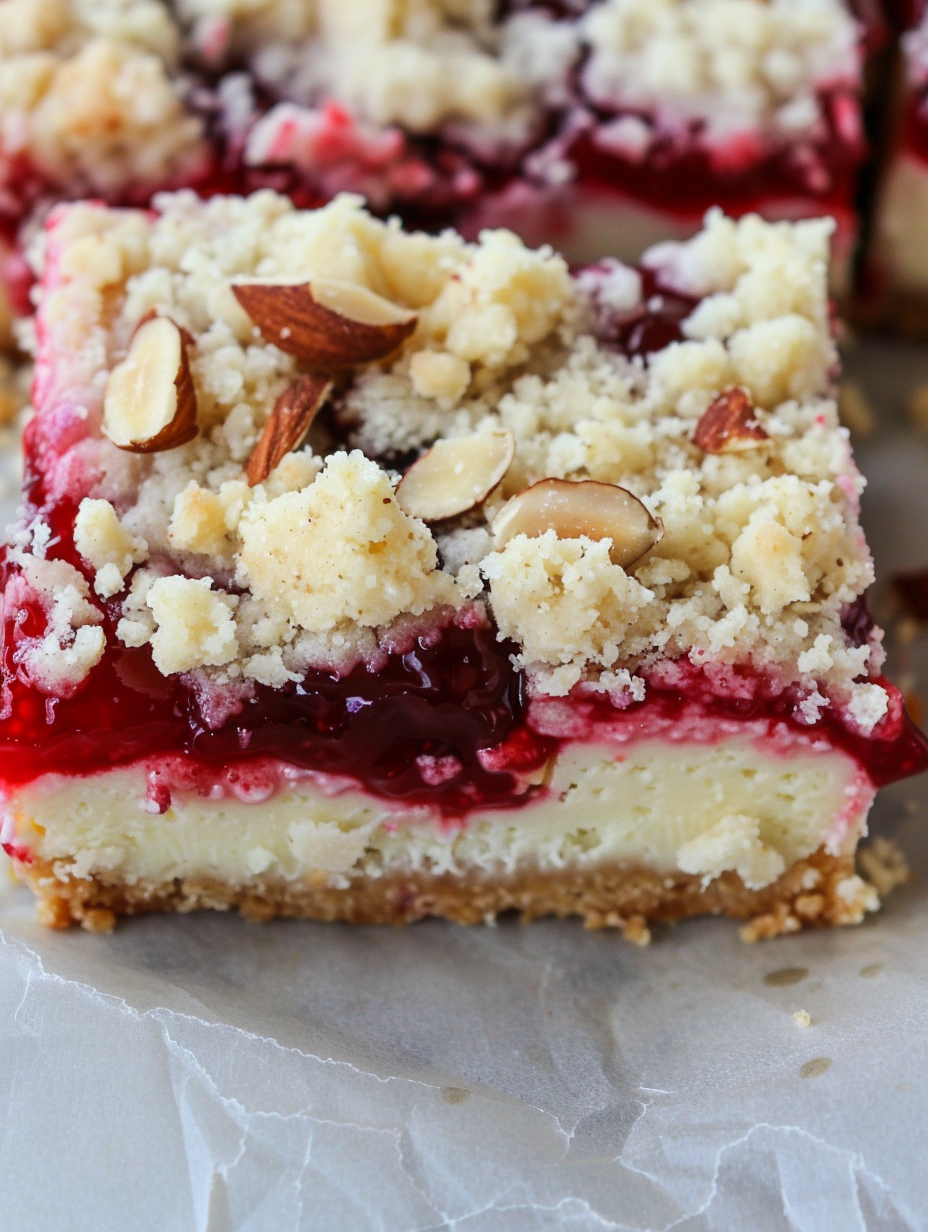
You Must Know
- These bars freeze well for up to 3 months. Freeze whole or sliced squares between layers of parchment to prevent sticking.
- Chilling time is essential for clean slices. A minimum of 2 hours in the refrigerator is recommended; overnight is ideal.
- The small amount of flour in the filling stabilizes the cream cheese so the bars hold their shape when cut.
- Use cold butter when making the crumble for the best texture; warm butter will create a denser topping.
My favorite aspect is how adaptable they are. I have swapped cherries for raspberry preserves and sprinkled toasted coconut for a tropical spin. At family brunch, these bars always stand out because they balance sweetness and texture so well. They make a great hostess gift when cut into squares and arranged in a bakery box with tissue paper.
Storage Tips
Store in an airtight container in the refrigerator for up to 5 days. If stacking squares, place parchment between layers to prevent sticking. For longer storage, freeze individual bars on a sheet tray until firm, then transfer to a freezer-safe container and store up to 3 months. Thaw in the refrigerator overnight for best texture. To revive a chilled bar to room temperature, leave it on the counter for 20 to 30 minutes so the cream cheese softens slightly for the best mouthfeel.
Ingredient Substitutions
If you need gluten-free options, substitute with a certified gluten-free sugar cookie mix and ensure the pie filling is gluten-free. For a nut-free version, omit the almonds and increase the reserved crumble by 1/4 cup or replace with toasted oats for crunch. Use low-fat cream cheese if you prefer a lighter option, but be aware it will be slightly less rich. For dairy-free versions, try a high-quality dairy-free cream cheese and vegan butter, and choose a vegan cookie mix, understanding the texture will be a touch different.
Serving Suggestions
Serve chilled on a dessert platter dusted lightly with powdered sugar or drizzled with melted dark chocolate for contrast. Pair with espresso or a lightly spiced mulled wine during the holidays. For a festive presentation, top each square with a fresh cherry or a small holly-shaped mint leaf made from fondant. These bars also complement a cheese board if you want to offer both savory and sweet options at a party.
Cultural Background
While these bars are not a traditional historic recipe, they draw on classic American comfort-dessert elements: a press-in cookie crust reminiscent of shortbread, a custard-like cream cheese layer inspired by cheesecake, and a fruit pie filling reflecting classic pie traditions. Combining pie filling with a cream cheese layer is a modern holiday innovation that blends familiar flavors into a portable, easy-to-serve confection ideal for gatherings.
Seasonal Adaptations
Adapt these bars to the season by swapping fillings: use apple pie filling spiced with cinnamon and a pecan crumble for autumn, lemon curd with a graham-style cookie base in spring, or blueberry topping for summer picnics. Holiday spices like a pinch of ground nutmeg in the cream cheese or orange zest in the crumble add cozy warmth for winter. Swap sliced almonds for toasted pistachios for a green accent at Christmas.
Meal Prep Tips
Make the crust and crumble up to two days ahead and store in the refrigerator. Prepare the cream cheese layer the morning of serving and assemble before baking. After baking and initial cooling, chill overnight for the best slicing and flavor development. Use a hot, clean knife and wipe it between cuts for neat squares. Package in single layers with parchment for gifting or take-along trays.
These bars bring holiday cheer without hours of fussy work. The textures and colors make them a memorable addition to any dessert table, and their make-ahead convenience means you can enjoy the season rather than be stuck in the kitchen.
Pro Tips
Use room-temperature cream cheese to ensure a smooth filling without lumps.
Chill the pan after blind-baking the crust so the cream layer spreads evenly and does not sink.
Use a sharp knife warmed in hot water and wiped dry between cuts for clean slices.
This nourishing christmas cheesecake bars recipe is sure to be a staple in your kitchen. Enjoy every moist, high protein slice — it is perfect for breakfast or as a wholesome snack any time.
Tags
Christmas Cheesecake Bars
This Christmas Cheesecake Bars recipe makes perfectly juicy, tender, and flavorful steak every time! Serve with potatoes and a side salad for an unforgettable dinner in under 30 minutes.
Ingredients
Crust & Crumble
Filling
Topping
Instructions
Preheat and prepare the pan
Preheat oven to 350 degrees Fahrenheit and prepare an 8 x 8-inch pan by spraying with non-stick spray or lining with parchment for easy removal.
Make the crumble mixture
Combine sugar cookie mix with cold cubed butter and use a fork or pastry cutter until the mixture is crumbly. Reserve 3/4 cup of this mixture and refrigerate while pressing the remainder into the pan.
Blind-bake the crust
Press the remaining crumble evenly into the bottom of the prepared pan and bake for 10 minutes. Remove and chill briefly in the refrigerator to cool the crust before adding filling.
Prepare the cream layer
Beat softened cream cheese with sugar, flour, vanilla, and the egg until smooth and creamy, scraping the bowl to avoid lumps.
Assemble the layers
Spread the cream cheese mixture over the cooled crust, spoon cherry pie filling across the top, and spread gently to allow some marbling between layers.
Add almond crumble
Stir sliced almonds into the reserved crumble mixture and sprinkle evenly over the cherry layer to form a crunchy topping.
Bake until set
Bake at 350 degrees Fahrenheit for about 40 minutes, until the center is mostly set with a slight jiggle. Avoid overbaking to keep the filling creamy.
Cool and chill
Cool on a wire rack for 30 minutes, then refrigerate for at least 2 hours or until cold and firm for best slicing results.
Slice and serve
Use a hot, clean knife wiped between cuts to slice into approximately 16 bars. Store chilled or freeze for longer storage.
Last Step: Please leave a rating and comment letting us know how you liked this recipe! This helps our business to thrive and continue providing free, high-quality recipes for you.
Nutrition
Did You Make This?
Leave a comment & rating below or tag
@yummique on social media!
Categories:
You might also like...

Cheesy Zucchini Rollatini Bake
Tender grilled zucchini wraps basil ricotta, bathed in marinara and mozzarella, baking into a bubbly, lighter Italian comfort dinner ready in 30 minutes.

Air Fryer Zucchini and Squash
Crisp-edged, tender-in-the-middle zucchini and yellow squash made in 15 minutes with pantry spices. A vibrant, veggie-forward side everyone devours.

Chicken Meatball Parmesan
Tender chicken meatballs simmered in rich marinara and blanketed with melty mozzarella, bringing all the flavors of chicken parm in cozy, bite-sized form.
Did You Make This?
Leave a comment & rating below or tag @yummique on social media!
Rate This Recipe
Share This Recipe
Enjoyed this recipe? Share it with friends and family, and don't forget to leave a review!
Comments (1)
This recipe looks amazing! Can't wait to try it.
Comments are stored locally in your browser. Server comments are displayed alongside your local comments.

Hi, I'm Amira!
What's Popular

30-Minute Meals!
Join to receive our email series which contains a round-up of some of our quick and easy family favorite recipes.