
Christmas Popcorn Balls

Festive no-bake popcorn balls made with buttered marshmallows, colorful M&Ms, and sprinkles — a quick, family-friendly holiday treat.
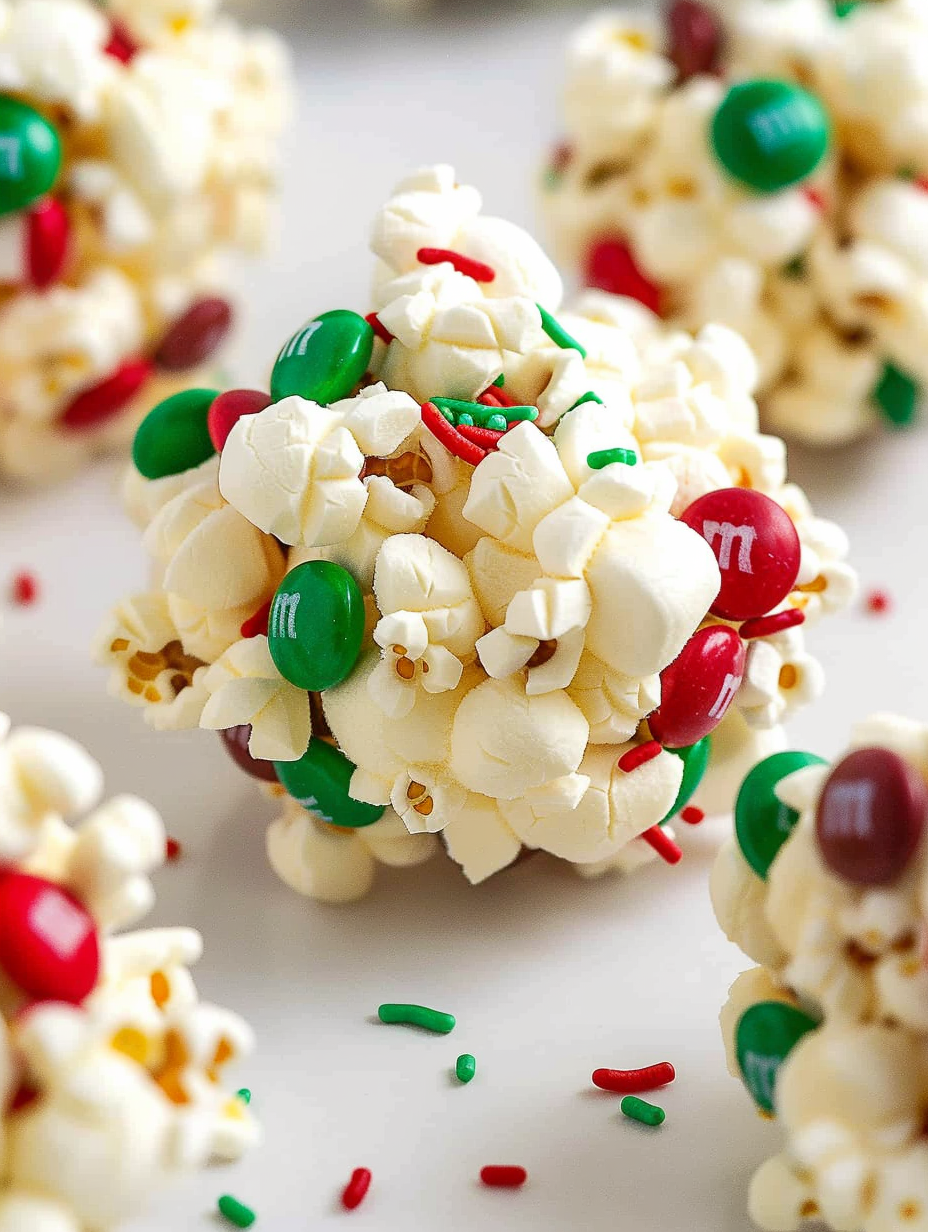
This recipe is my go-to festive treat every December: Christmas popcorn balls that bridge the gap between nostalgic carnival snacks and holiday cookie exchanges. I first made them when my niece was three and insisted we make something she could both decorate and carry to preschool for a holiday party. The result was instant magic — the house smelled like toasted popcorn and butter, colorful candies glinted in the marshmallow coating, and everyone wanted more. They are crunchy, chewy, and perfectly sweet, with playful pops of M&M color and a dusting of sprinkles that screams holiday cheer.
What I love most about these is how forgiving they are. You can scale the batch up or down, adapt the candies for dietary needs, or shape them into mini snowballs for an elegant platter. The texture balance is simple: crisp popped corn enveloped in a warm marshmallow glue that cools into a slightly chewy exterior. Form them while the marshmallow is warm but not scalding; that’s the sweet spot for a compact ball that still has a tender bite. These are ideal for classroom treats, last-minute hostess gifts, or a hands-on activity with kids around the kitchen island.
Why You'll Love This Recipe
- Ready in about 30 minutes total — 20 minutes of prep and about 10 minutes of active melting and shaping, perfect for last-minute holiday baking marathons.
- Uses pantry staples: popcorn kernels, mini marshmallows, butter, and M&M candies — no complicated shopping list required.
- No oven required, making it a great option for kitchens without spare oven space during big gatherings.
- Make-ahead friendly: they hold at room temperature for several days and travel well in airtight containers for gifting.
- Kid-friendly assembly: small hands can help press and decorate, while adults handle the hot marshmallow step.
- Customizable: swap candies, add nuts for crunch, or press a few extra M&Ms on the outside to avoid interior melting.
My family reaction every year is the same: smiles, sticky fingers, and requests to make a double batch. The first time we took a plate to a neighbor, they returned it with a note saying the popcorn balls were gone within an hour. That kind of feedback keeps this one in my holiday rotation.
Ingredients
- Popcorn kernels: 1/2 cup of unpopped kernels yields about 12 to 16 cups of popped corn depending on your popper; choose a fresh bag for crisp, fully popped pieces. Air popper or stovetop popping both work well.
- Unsalted butter: 1/2 cup (1 stick) — melts smoothly into the marshmallows and adds richness without making the mixture greasy. Use high-quality butter for the best flavor.
- Miniature marshmallows: One 10-ounce bag provides the sticky, binding sweetness. Mini marshmallows melt faster and coat more evenly than large ones.
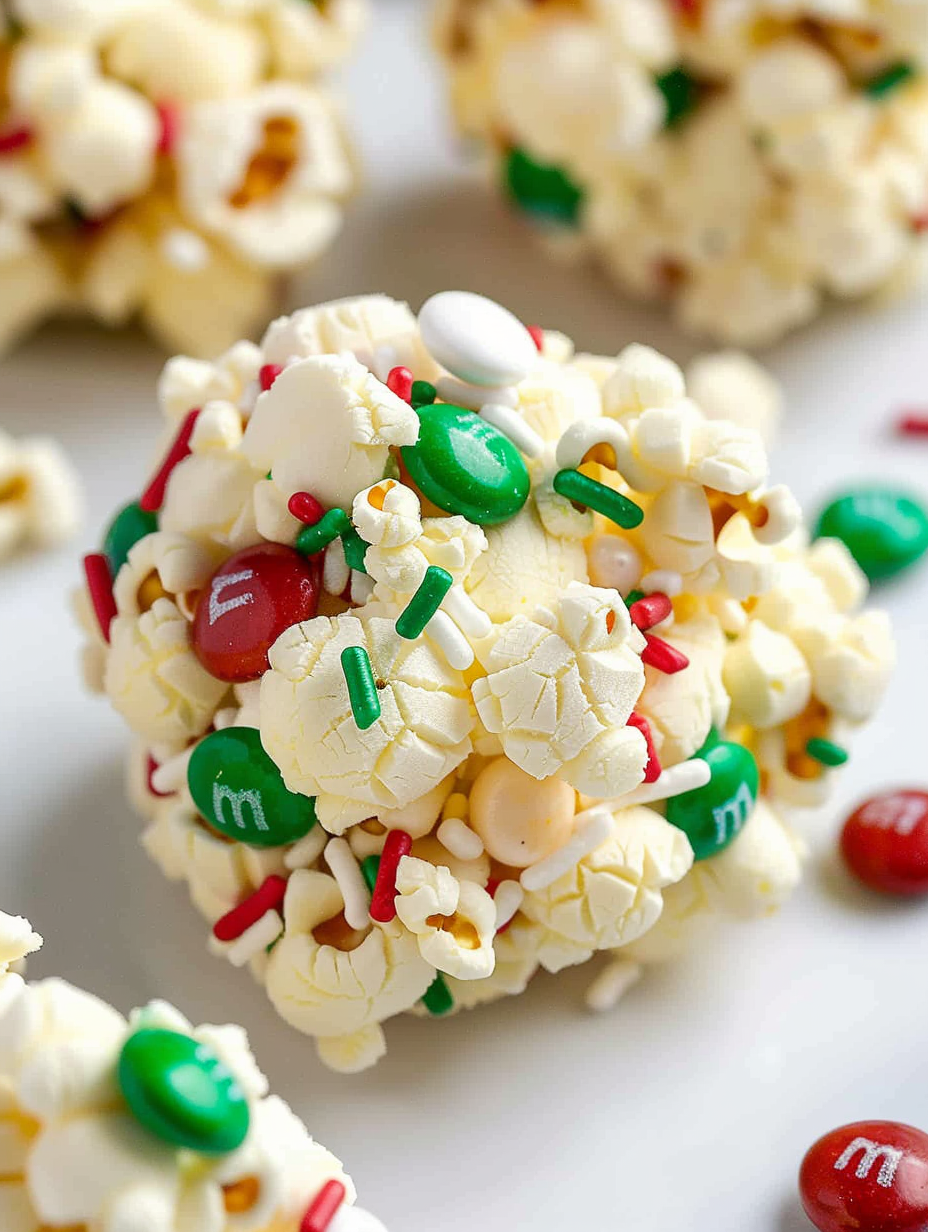
- Red and green M&M candies: 1 cup — choose the plain M&Ms for the classic look. If you prefer peanut or peanut-free, adjust based on allergies.
- Festive sprinkles: 1/3 cup — brightens the surface and adds a tiny bit of texture; nonpareils or small jimmies both work well.
Instructions
Pop the corn: Use your preferred method to pop 1/2 cup of kernels until fluffy and light, then transfer to a large mixing bowl. Remove any unpopped kernels carefully by hand to avoid teeth mishaps. Aim for about 12 to 16 cups popped corn; excess unpopped kernels will burn if left in the pan. Melt butter and marshmallows: In a large, heavy-bottomed pot over medium-low heat, melt 1/2 cup butter. Once melted, add the entire 10-ounce bag of mini marshmallows. Stir continuously with a heatproof spatula until the marshmallows are completely melted and glossy — about 3 to 5 minutes. Keep the heat moderate to prevent scorching and to get a smooth, elastic marshmallow syrup. Coat the popcorn: Immediately pour the melted marshmallow-butter mixture over the popped corn. Fold gently with the rubber spatula to coat evenly, working quickly before the marshmallow sets. You want a thin, even coating rather than globs of marshmallow. Fold in candies and sprinkles: Allow the mixture to cool for a minute so it is easier to handle, then fold in 1 cup M&Ms and 1/3 cup sprinkles. If you wait too long and the marshmallow firms up, microwave the pot for 10 to 15 seconds to soften again. Form balls: Spray your hands lightly with non-stick cooking spray and keep the spray nearby. Scoop about 1 cup of the coated popcorn mixture and press gently into a firm ball shape; compacting too hard squeezes out candy and flattens the texture, so use gentle pressure. Expect to get about 15 balls sized to serve a crowd. Set and store: Place formed balls on a sheet of parchment and allow them to cool at room temperature until fully set. Store in an airtight container at room temperature for up to 5 days.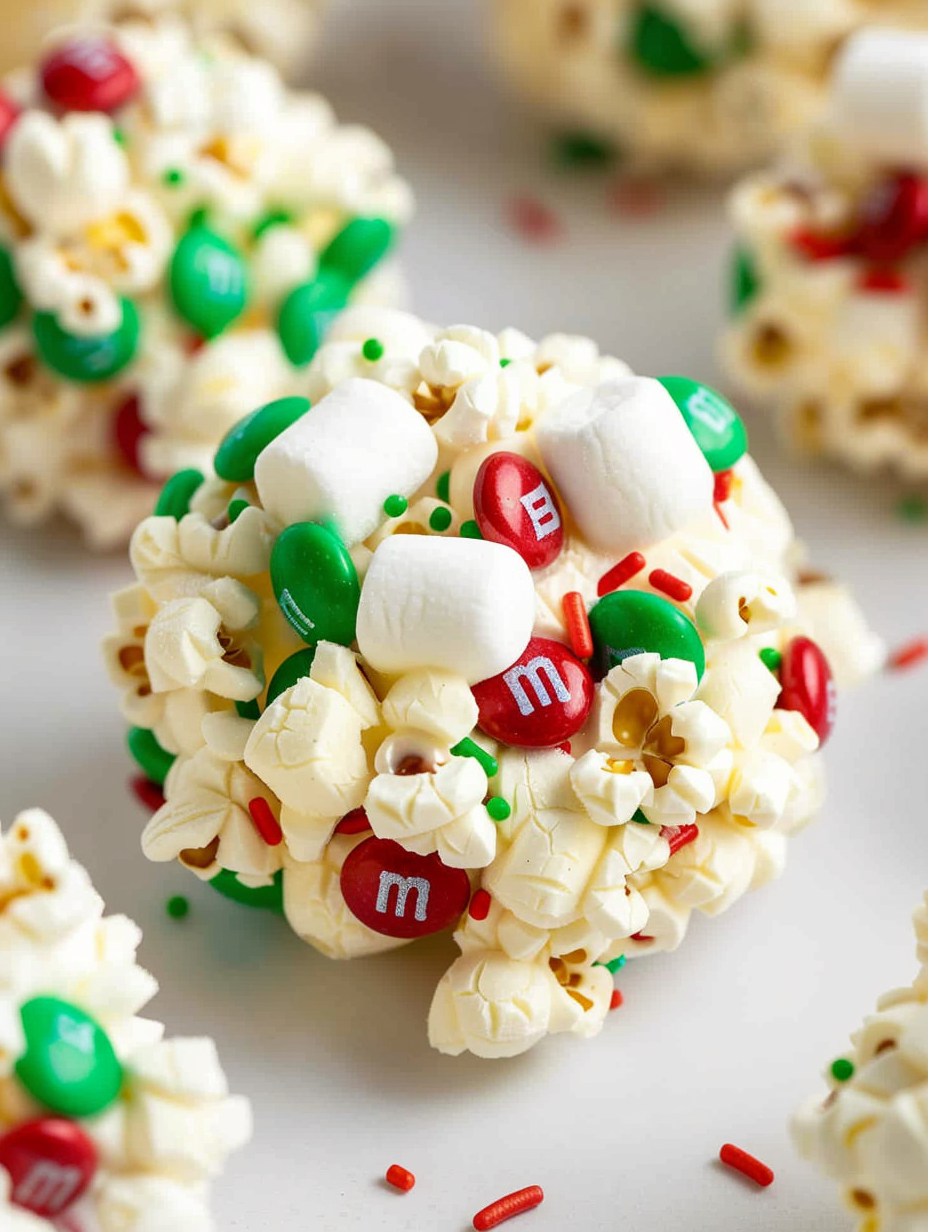
You Must Know
- High in simple sugars and calories: each serving contains about 147 kcal, so they are best enjoyed as an occasional treat.
- Store at room temperature in an airtight container for up to 5 days; refrigeration will make them harder and chewier.
- They travel well in single layers separated by parchment to prevent sticking for gift plates or school parties.
- To avoid melted M&Ms, press a few candies onto the outside of each ball immediately after forming, or chill briefly before packaging.
My favorite aspect is the ritual: melting the marshmallows with butter, the pop of the first kernel, and the communal shaping. It’s less about perfection and more about creating memories; in one year I watched three generations roll balls together, and the youngest was proud to hand-deliver her creations.
Storage Tips
Keep the popcorn balls at room temperature in a single layer inside an airtight container. If stacking is necessary, separate layers with parchment paper to prevent sticking. Avoid refrigerating since cold will make the marshmallow coating firm and chewy; if you must refrigerate due to very warm conditions, take them out an hour before serving to let them soften. For longer preservation, wrap individual balls tightly in plastic wrap, place in a freezer bag, and freeze up to 3 months — thaw at room temperature for 30 to 45 minutes before serving.
Ingredient Substitutions
Swap plain M&Ms for peanut M&Ms to add crunch, but note this introduces tree nut/peanut allergens. For a peanut-free household, use yogurt-covered candies or chocolate chips that are labeled peanut-free. Substitute vegan marshmallows for a plant-based version, keeping in mind texture will be slightly different and some vegan marshmallows are less sticky. For a lower-sugar twist, reduce M&Ms to 1/2 cup and add 1/2 cup of toasted nuts or seeds; flavor will be less candy-forward and more complex.
Serving Suggestions
Serve on a decorated platter lined with holiday napkins for a festive touch. Pair with cocoa or a creamy eggnog for adult gatherings. Mini balls work well in gift bags for neighbors; embellish each with a ribbon and a handwritten tag. For a buffet, offer a small bowl of extra M&Ms and a sprinkle jar so guests can customize their portion.
Cultural Background
Sweet popcorn confections have a long history at fairs and carnivals in North America. The idea of binding popcorn with a sugary syrup dates back to early 20th-century snack stands, evolving into handheld rounds over time. These popcorn balls borrow that carnival spirit and adapt it for modern holidays by adding seasonal colors and sprinkles, turning a classic roadside snack into a festive centerpiece.
Seasonal Adaptations
For winter, use red and green candies and peppermint sprinkles; for Valentine’s Day, switch to pink and red candies and heart-shaped sprinkles. In autumn, swap M&Ms for caramel bits and replace sprinkles with crushed pretzels for a sweet-salty twist. Adjust candy choices and color schemes to match any holiday or party theme.
Meal Prep Tips
Form balls the night before your event and store them in a single-layer airtight container. If prepping for a long trip, wrap individually in wax paper and keep in a cool, dry place. Keep a small bottle of non-stick spray near your shaping station to refresh your hands as needed — this significantly reduces stickiness and speeds up assembly.
These popcorn balls are a simple, joyful way to bring color and crunch to the holidays. Whether you make them with kids, give them as gifts, or set them out at a party, they reliably deliver nostalgia and smiles. Try a batch this season and make the recipe your own — swap candies, form mini versions, or turn them into edible ornaments for the tree.
Pro Tips
Spray your hands lightly with non-stick cooking spray before shaping to prevent sticking and to make forming balls easier.
Press a few M&M candies onto the outside of each ball immediately after forming to avoid internal melting from hand warmth.
Store in a single layer with parchment between layers to prevent sticking and maintain crispness.
If the marshmallow mixture firms up while mixing, warm it in the pot over low heat or microwave 10 to 15 seconds to regain pliability.
This nourishing christmas popcorn balls recipe is sure to be a staple in your kitchen. Enjoy every moist, high protein slice — it is perfect for breakfast or as a wholesome snack any time.
Tags
Christmas Popcorn Balls
This Christmas Popcorn Balls recipe makes perfectly juicy, tender, and flavorful steak every time! Serve with potatoes and a side salad for an unforgettable dinner in under 30 minutes.
Ingredients
Main
Instructions
Pop the kernels
Pop 1/2 cup popcorn kernels using an air popper or stovetop. Transfer popped corn to a large bowl and remove any unpopped kernels by hand.
Melt butter and marshmallows
In a large pot over medium-low heat, melt 1/2 cup unsalted butter. Add the 10-ounce bag of miniature marshmallows and stir continuously until melted and smooth, about 3 to 5 minutes.
Coat the popcorn
Pour the melted marshmallow mixture over the popped corn and fold gently with a rubber spatula until evenly coated. Work quickly to prevent the marshmallow from setting.
Fold in candies and sprinkles
Allow the coated mixture to cool slightly, then fold in 1 cup of red and green M&M candies and 1/3 cup sprinkles. If the mixture firms, warm briefly to soften.
Form the balls
Spray hands with non-stick cooking spray. Scoop approximately 1 cup of the mixture and gently press into a ball. Repeat until mixture is used. Expect about 15 balls depending on size.
Set and store
Place formed balls on parchment and allow to cool completely at room temperature. Store in an airtight container for up to 5 days or freeze for longer storage.
Last Step: Please leave a rating and comment letting us know how you liked this recipe! This helps our business to thrive and continue providing free, high-quality recipes for you.
Nutrition
Did You Make This?
Leave a comment & rating below or tag
@yummique on social media!
Categories:
You might also like...

Cheesy Zucchini Rollatini Bake
Tender grilled zucchini wraps basil ricotta, bathed in marinara and mozzarella, baking into a bubbly, lighter Italian comfort dinner ready in 30 minutes.

Air Fryer Zucchini and Squash
Crisp-edged, tender-in-the-middle zucchini and yellow squash made in 15 minutes with pantry spices. A vibrant, veggie-forward side everyone devours.

Chicken Meatball Parmesan
Tender chicken meatballs simmered in rich marinara and blanketed with melty mozzarella, bringing all the flavors of chicken parm in cozy, bite-sized form.
Did You Make This?
Leave a comment & rating below or tag @yummique on social media!
Rate This Recipe
Share This Recipe
Enjoyed this recipe? Share it with friends and family, and don't forget to leave a review!
Comments (1)
This recipe looks amazing! Can't wait to try it.
Comments are stored locally in your browser. Server comments are displayed alongside your local comments.

Hi, I'm Amira!
What's Popular

30-Minute Meals!
Join to receive our email series which contains a round-up of some of our quick and easy family favorite recipes.