
Breadsticks (Grissini) — Crispy Herb and Seed Sticks

These classic Italian breadsticks, or grissini, are crisp, customizable with seeds or herbs, and perfect alongside cheese or a charcuterie board. Yields 16 to 20 long breadsticks.
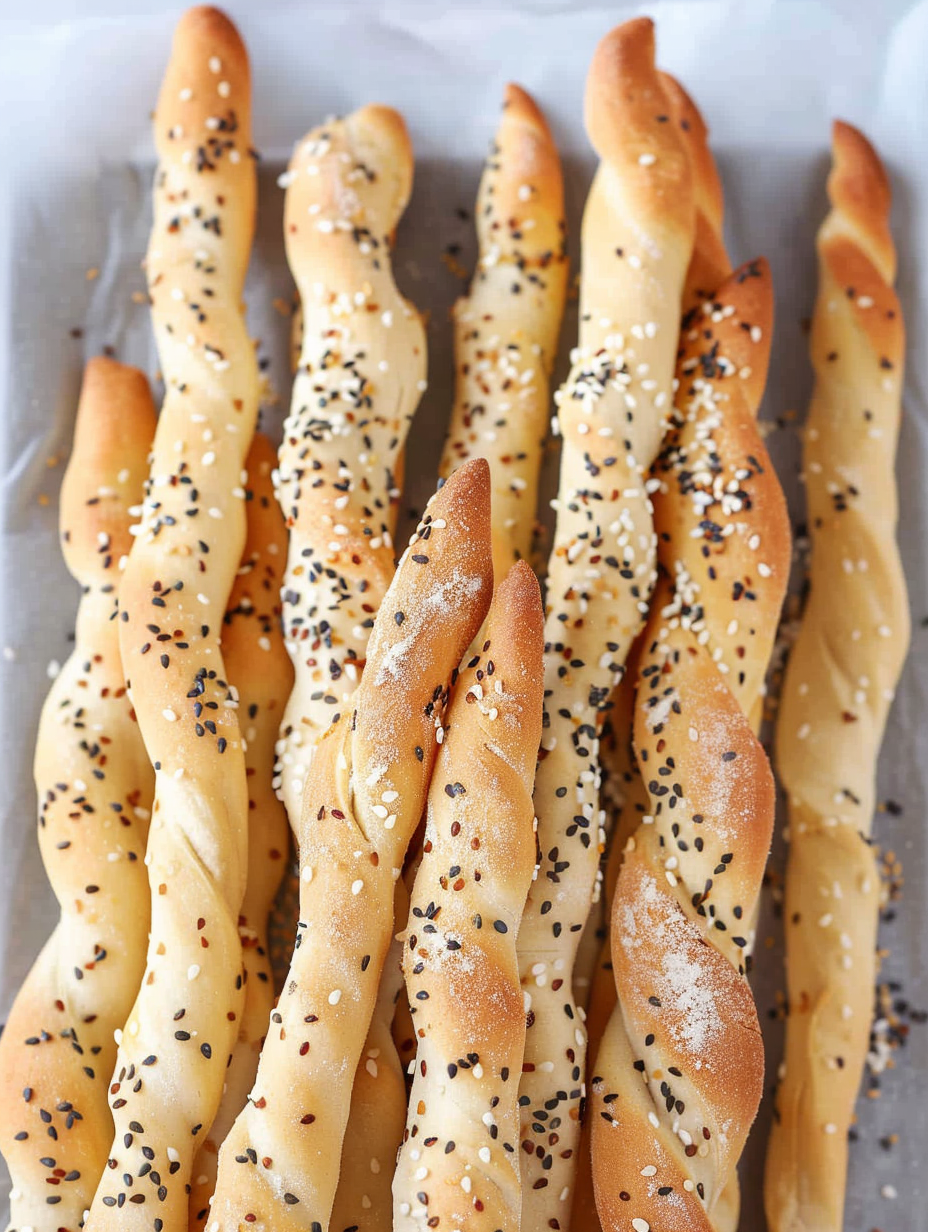
These breadsticks, known as grissini in northern Italy, have been a kitchen staple in my house since I first learned to shape dough into long, crackly sticks back in winter 2020. I published the original version that December, and after several tests and sensible tweaks they are even better now. They are thin, golden, and crackle when you snap them. The contrast between a crisp exterior and a dry, tender interior makes them ideal for dipping or serving with soft cheeses. I keep a batch of these on hand for last minute entertaining. They store well and are one of those little efforts that make a cheese board look deliberate and elegant.
I discovered this method while trying to stretch a small amount of dough into many pieces for a party. The trick is a short, confident knead, generous brushing of olive oil, and a gentle stretch before baking. The result keeps well, travels without complaint, and every topping from sesame to flaky sea salt changes the personality of the sticks. Kids love the way they snap, guests love the texture, and I love how simple the ingredients are. This updated version reflects what I learned about proofing, oven temperature, and how thin you can safely pull the strips without burning them.
Why You'll Love This Recipe
- Quick active work time. You only need about 10 minutes of prep to get the dough ready, making it ideal for a fast snack or last minute appetizer.
- Customizable toppings. Use sesame, poppy, chia, rosemary, or grated parmesan to change flavor and texture without changing technique.
- Great make ahead options. The dough freezes after kneading and the baked sticks keep for several days in an airtight container.
- Uses pantry staples. Flour, yeast, salt, olive oil, and water are the only essentials, so you can make a batch with little planning.
- Perfect for boards. Crisp, long sticks pair beautifully with cheeses, cured meats, or dips, and they travel well for picnics or parties.
- Beginner friendly. The method is forgiving. Small size or shape irregularities add rustic charm rather than ruin the outcome.
I first served these alongside a winter cheese plate and watched them disappear. Family members who usually skip bread reached for a second stick. Over the years I refined the oil brushing and learned to avoid over stretching the thinnest spots, which can burn. The recipe yields about 16 to 20 long sticks depending on how thin you pull the strips, enough for a small gathering.
Ingredients
- 2 cups bread flour or all purpose flour: Bread flour gives a slightly chewier interior and a crisper crust. If all purpose is what you have, it works fine. Look for unbleached flour for best flavor.
- 1 teaspoon fine salt: Use fine salt for even distribution. Reduce to three quarters teaspoon if you plan to add grated parmesan.
- 1 teaspoon instant yeast: Instant yeast gives a reliable rise without proofing. Active dry yeast can be used if dissolved briefly in the lukewarm water first.
- 1 half cup plus 1 tablespoon lukewarm water: Lukewarm means just warmer than room temperature. Too hot will kill yeast. If your dough feels dry add the extra tablespoon slowly.
- 1 quarter cup olive oil: Extra virgin olive oil adds flavor and a crisp, golden finish. You can substitute neutral oil if you prefer a less pronounced flavor.
- 2 to 3 tablespoons seeds or herbs optional: Sesame, poppy, chia, or chopped rosemary are all excellent. Use what you enjoy and press them into the surface after brushing with oil.
- Optional extras: A quarter cup freshly grated parmesan or a teaspoon garlic powder can be mixed into the dough for a savory twist. If using parmesan reduce the added salt slightly.
Instructions
Combine dry ingredients: In a large mixing bowl whisk together 2 cups flour, 1 teaspoon salt, and 1 teaspoon instant yeast until evenly blended. If you are adding parmesan or garlic powder stir them in now so the flavors distribute through the dough. Add liquids and form dough: Pour in one half cup plus 1 tablespoon lukewarm water and one quarter cup olive oil. Use a spatula to fold the mixture until a shaggy dough forms. The dough will look slightly rough at first but become cohesive as you work it. Knead briefly: Turn the dough onto a lightly floured surface and knead by hand for about 1 to 2 minutes. The goal is a smooth, pliable dough. You want it workable not tight. If the dough sticks add a dusting of flour sparingly so the dough remains pliable. Shape on parchment and brush: Place the dough on a parchment lined baking sheet and press gently into a rectangle about 11 by 7 inches. Brush liberally with olive oil or melted butter and sprinkle your chosen seeds or herbs. Cover loosely with plastic wrap and let it rise in a warm spot for about 1 hour until puffed. Preheat and prepare baking sheets: When the dough is nearly done proofing preheat your oven to 400 degrees Fahrenheit and line two baking sheets with parchment paper so you can move quickly once the dough is cut and stretched. Cut and stretch the strips: Using a pizza cutter slice the dough crosswise into half inch strips. Hold the end of each strip and pull gently to lengthen and thin it, then transfer to the prepared baking sheet. Aim for consistent thickness. If some sections are much thinner they will brown too quickly so avoid making overly thin sections. Bake until golden and crisp: Bake the sticks for 15 minutes then check for a deep golden color and crisp texture. Depending on your oven and the thickness of the sticks you might need up to 20 minutes. They should be dry and brittle when cooled. Cool and store: Let the sticks cool completely on a rack. They continue to crisp as they cool. Store in an airtight container for up to 4 days or freeze in a zip top bag for longer storage.
You Must Know
- These sticks are thin and crisp and therefore not gluten free. Use a certified gluten free flour blend and adjust liquid for a gluten free variation, though texture will differ.
- Freezing options. You can freeze the dough after the knead in an airtight bag. Thaw completely and allow it to puff again before shaping for best results.
- Storage and shelf life. Baked sticks keep well in an airtight container for up to 4 days at room temperature. If they soften, re-crisp briefly in a 350 degrees Fahrenheit oven for 5 minutes.
- Nutritional note. Each stick averages about 77 calories and 10 grams carbohydrates depending on the size and toppings.
My favorite aspect is how versatile these are. A sprinkle of coarse sea salt transforms them into a savory snack. A dusting of rosemary and parmesan makes them special enough for a gathering. Over the years family members have adopted them as a lunchbox treat and a travel friendly nibble for road trips.
Storage Tips
Store cooled sticks in an airtight container at room temperature away from humidity to preserve crispness. If you expect to keep them longer than four days, freeze cooled sticks in a freezer safe bag with parchment between layers to prevent sticking. When ready to serve remove from freezer and warm in a 325 degrees Fahrenheit oven for 5 to 8 minutes to restore crunch. For the dough, freeze after kneading in a zip top bag. Thaw overnight in the refrigerator then bring to room temperature until it has visibly puffed before shaping and baking for consistent rise.
Ingredient Substitutions
If you only have all purpose flour use it exactly as the recipe states. For a nuttier flavor try half whole wheat flour and half bread flour but increase the water by one or two tablespoons to account for higher absorption. Swap olive oil for melted butter for richer flavor. If you want cheesy sticks add a quarter cup grated parmesan into the dough and reduce salt slightly. For gluten free, use a commercial gluten free blend designed for yeast baking and expect a softer interior. Seeds can be swapped one for another in equal amounts; pressing them into the surface helps them adhere.
Serving Suggestions
Serve the sticks with soft cheeses like burrata or ricotta, or alongside firm cheeses and cured meats on a charcuterie board. They make an excellent vessel for tapenade, hummus, or olive oil for dipping. For a family friendly snack present them in a tall jar so people can grab easily. At dinner parties arrange them fanned around small bowls of herbed labneh, roasted red pepper dip, or aged balsamic for contrast.
Cultural Background
Grissini originate from the Piedmont region of Italy. Historically they were created in the 17th century to feed a duke who had trouble digesting traditional bread crumb textures. The long, thin shape made them easy to nibble and keep for longer periods. Through time they became a staple in Italian dining, especially as an accompaniment to antipasti and soups. Regional differences exist. Some areas prefer very thin and crunchy sticks, others a slightly thicker breadstick with a chewier interior.
Seasonal Adaptations
Change toppings with the seasons. In spring use lemon zest and fennel seed. Summer is great for dried tomato flakes and oregano. Autumn invites chopped toasted walnuts and sage. Winter benefits from robust herbs such as rosemary and crushed fennel seed with a light dusting of parmesan. The basic dough is the constant while the toppings provide seasonal personality to pair with other dishes on your table.
Meal Prep Tips
Prepare the dough the night before and refrigerate after the initial mix. This slow cold fermentation develops flavor. In the morning bring dough to room temperature, shape, and proof briefly before baking. For large gatherings double the recipe and bake on multiple sheets in rotation. Cool baked sticks completely before packing into airtight containers for transport. When reheating for a display set a timer and re-crisp in a moderate oven so they appear freshly made.
Enjoy making these crisp grissini. They are small, friendly, and endlessly adaptable. Whether served simply with olive oil for dipping or as the backbone of an elaborate cheese board, they bring a tactile delight to the table that people remember. Make them yours with your favorite seeds and herbs and watch how a simple combination of flour, water, oil, and yeast becomes a memorable bite.
Pro Tips
Brush generously with oil so seeds adhere and edges brown evenly.
Avoid overstretching thin sections to prevent burning during baking.
Cool completely before storing to preserve crispness.
If sticks soften, re-crisp in a 350 degrees Fahrenheit oven for 5 minutes.
This nourishing breadsticks (grissini) — crispy herb and seed sticks recipe is sure to be a staple in your kitchen. Enjoy every moist, high protein slice — it is perfect for breakfast or as a wholesome snack any time.
FAQs about Recipes
How warm should the water be?
Lukewarm water should feel slightly warm to the wrist. If you cannot touch it comfortably it is too hot for yeast.
Can I freeze the dough?
Yes. After kneading freeze the dough in an airtight bag. Thaw fully, let it puff again, then shape and bake as directed.
Tags
Breadsticks (Grissini) — Crispy Herb and Seed Sticks
This Breadsticks (Grissini) — Crispy Herb and Seed Sticks recipe makes perfectly juicy, tender, and flavorful steak every time! Serve with potatoes and a side salad for an unforgettable dinner in under 30 minutes.
Ingredients
Dough
Toppings optional
Instructions
Combine dry ingredients
Whisk together flour, salt, and yeast in a large bowl. Add parmesan or garlic powder now if using so flavors blend evenly.
Add liquids and form dough
Stir in lukewarm water and olive oil with a spatula until a cohesive shaggy dough forms.
Knead briefly
Turn dough onto a lightly floured surface and knead 1 to 2 minutes until smooth and pliable.
Shape and brush
Press the dough into an approximately 11 by 7 inch rectangle on parchment. Brush with oil and sprinkle seeds or herbs. Cover and let rise about 1 hour in a warm place.
Preheat and prepare
Preheat oven to 400 degrees Fahrenheit and line two baking sheets with parchment paper.
Cut and stretch
Cut the dough into half inch strips with a pizza cutter. Gently pull each strip to lengthen and place on the baking sheet, keeping consistent thickness.
Bake
Bake for 15 minutes then check. Continue up to 20 minutes until deep golden and crisp. Thicker sticks may take longer.
Cool and store
Cool completely on a rack to finish crisping. Store in an airtight container up to four days or freeze for longer storage.
Last Step: Please leave a rating and comment letting us know how you liked this recipe! This helps our business to thrive and continue providing free, high-quality recipes for you.
Nutrition
Did You Make This?
Leave a comment & rating below or tag
@yummique on social media!
Categories:
You might also like...

Cheesy Zucchini Rollatini Bake
Tender grilled zucchini wraps basil ricotta, bathed in marinara and mozzarella, baking into a bubbly, lighter Italian comfort dinner ready in 30 minutes.

Air Fryer Zucchini and Squash
Crisp-edged, tender-in-the-middle zucchini and yellow squash made in 15 minutes with pantry spices. A vibrant, veggie-forward side everyone devours.

Chicken Meatball Parmesan
Tender chicken meatballs simmered in rich marinara and blanketed with melty mozzarella, bringing all the flavors of chicken parm in cozy, bite-sized form.
Did You Make This?
Leave a comment & rating below or tag @yummique on social media!
Rate This Recipe
Share This Recipe
Enjoyed this recipe? Share it with friends and family, and don't forget to leave a review!
Comments (1)
This recipe looks amazing! Can't wait to try it.
Comments are stored locally in your browser. Server comments are displayed alongside your local comments.

Hi, I'm Amira!
What's Popular

30-Minute Meals!
Join to receive our email series which contains a round-up of some of our quick and easy family favorite recipes.