
Christmas Tree Cake Truffles

No-bake Christmas truffles made from Little Debbie Christmas Tree Cakes, cream cheese, and vanilla almond bark — perfect for holiday gifting and cookie trays.
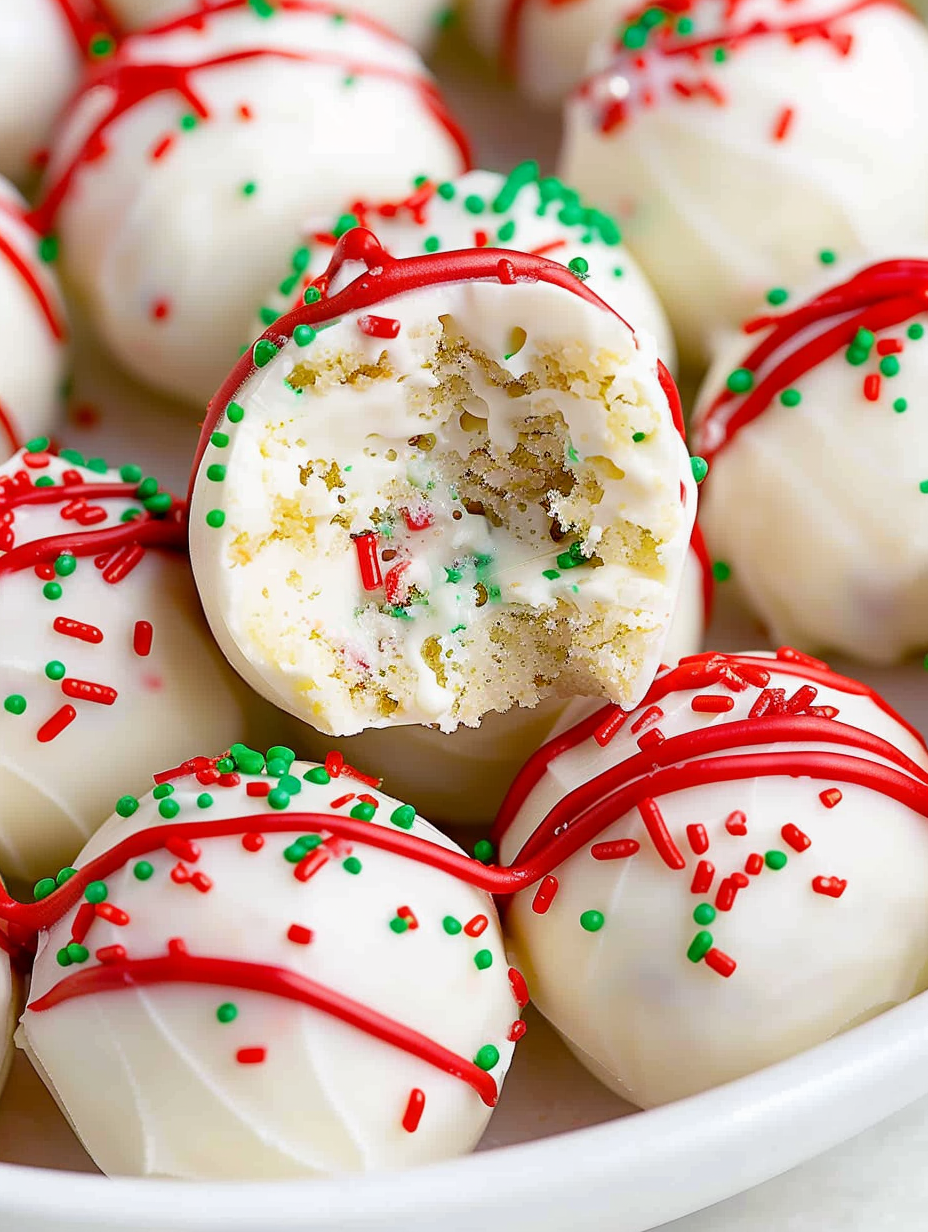
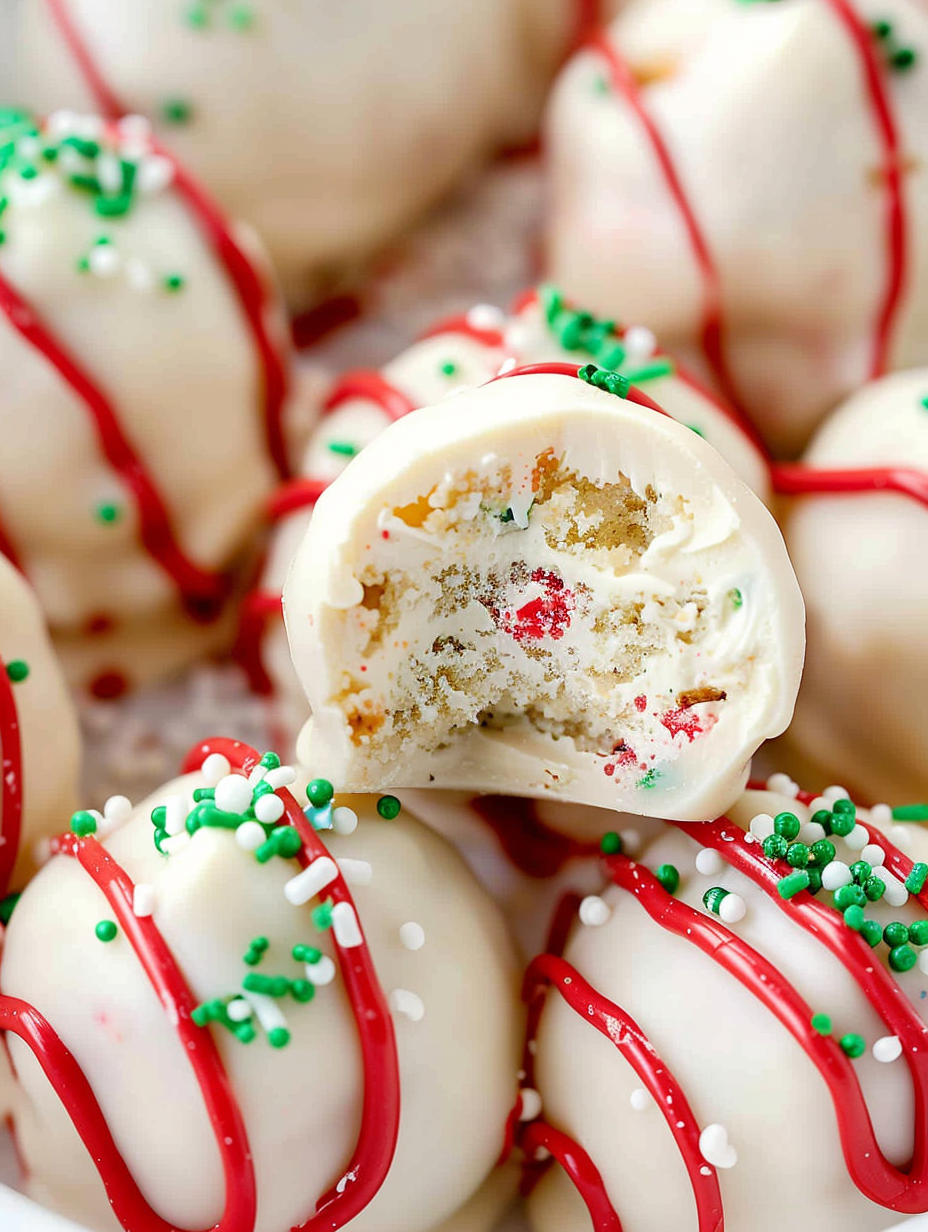
These Christmas tree cake truffles are one of those joyful, slightly naughty holiday treats that rework a nostalgic snack into something utterly giftable. I first made them while wrapping presents late one December evening; a friend dropped off a box of Little Debbie Christmas Tree Cakes and I thought, why not turn these into truffles? The combination of soft snack cake and tangy cream cheese makes a creamy, spreadable center that’s easy to portion and even easier to coat in sweet vanilla bark. The finished bite is fluffy, slightly chewy at the center, and crisp with the vanilla coating — with a pop of red from candy melt drizzle and a dusting of green sugar that reads festive at first glance.
What I adore most is how approachable this is: five main ingredients, no baking, and the kind of portability that makes them perfect for cookie exchanges, party platters, or tied up in cellophane for neighbors. I’ve adapted portion sizes to yield 32 cake balls — a generous batch that disappears fast at holiday gatherings. Over the years I’ve refined the chill time and dipping technique so the coating sets cleanly without cracking, and I’ll walk you through those little tricks here.
Why You'll Love This Recipe
- Makes about 32 truffles in one batch, ideal for cookie trays or gifting without complicated steps; ready to assemble in roughly 30 minutes plus chilling.
- Uses five accessible ingredients — pantry-friendly snack cakes, cream cheese, vanilla almond bark, sugar sprinkles and candy melts — so you can shop in one stop.
- No oven required: these are completely no-bake so they’re great for busy holiday schedules and apartment kitchens.
- Prep-ahead friendly: centers can be formed and frozen, then dipped the day of the party for fresher coating and neater presentation.
- Customizable: swap the snack cake flavor or coating to suit dietary needs or to create a chocolate version for richer trays.
- Crowd-pleasing texture: the cream cheese adds moisture and helps the balls hold shape while the almond bark gives a clean snap when bitten.
I remember my son helping me roll these for the first time — he insisted on making each one perfectly round and gave the strictest quality-control taste tests. They became an instant favorite at school parties and neighbors’ gift exchanges. Over multiple batches I learned to freeze the shaped balls until firm, which saves dipping time and prevents the centers from absorbing too much of the coating.
Ingredients
- Little Debbie Christmas Tree Cakes (2 boxes, 10 cakes total): The base flavor and texture come from these snack cakes — look for the original frosted variety for the classic sweet profile that pairs well with cream cheese.
- Cream cheese (8 ounces, brick-style, softened): Use full-fat brick-style for stability and flavor; softened to room temperature so it blends into a smooth, cohesive center without lumps.
- Vanilla almond bark (1 pound): Also labeled candy melts or vanilla coating; almond bark gives a firm, snappy shell. Choose a quality brand for clean melting and gloss.
- Green sugar sprinkles (to decorate): Superfine or regular decorative sugars work — they add immediate holiday color and a slight crunch.
- Red candy melts (1/2 cup): Melted and used for a thin drizzle to simulate ornaments or garland; melts are easier to work with than melted chocolate for bright colors.
Instructions
Unwrap and crumble the snack cakes: Fully unwrap all 10 snack cakes and place them in a large mixing bowl. Use clean hands to break them into small crumbs or pulse briefly in a food processor until you have a coarse, even crumb. Aim for no large chunks so the centers will be smooth. Combine with cream cheese: Add the softened 8 ounces of brick-style cream cheese to the crumbs. Use an electric hand mixer on medium speed and mix until the texture is homogenous and spreadable — about 1–2 minutes. If the mixture seems too wet, chill briefly; if too firm, let it sit at room temperature for a few minutes. Portion and shape: Use a one-tablespoon scoop to portion the mixture, then roll each portion into a tight ball between your palms. You should yield approximately 32 truffles. Place them on a parchment-lined baking sheet at least 1/2 inch apart to keep them from sticking as they firm up. Freeze until firm: Freeze the tray for 30–60 minutes. The centers should be firm but not rock-hard — this makes dipping easier and prevents the centers from absorbing too much warmth from the melted coating. Melt the vanilla almond bark: Melt the almond bark per package directions, either in 30-second bursts in the microwave stirring between each cycle or over a double boiler. Heat until smooth and silky, avoiding any water contact which can seize candy coatings. Dip the truffles: Using a dipping fork or two forks, dip each frozen ball into the melted almond bark, tapping gently on the side of the bowl to remove excess. Return to parchment and immediately sprinkle with green sugar before the coating sets for the most even adhesion. Drizzle with red candy melts: Melt the red candy melts in short bursts until fluid. Transfer to a small piping bag or use a fork, then drizzle a light line over the top of each coated truffle to resemble ornaments. Allow coating to harden at room temperature or pop in the fridge for a few minutes to speed set. Store and serve: Once fully set, store in an airtight container in the refrigerator for up to one week or freeze for up to three months. Thaw in the fridge before serving for the best texture.
You Must Know
- These keep refrigerated for up to 1 week and freeze well for up to 3 months in an airtight container; thaw in the refrigerator before serving.
- Use brick-style full-fat cream cheese for structure; whipped-style spreads contain more water and can make centers too loose.
- If the candy coating thickens, reheat gently in 10- to 15-second microwave bursts and stir to smooth; avoid overheating which can cause graininess.
- Portioning with a one-tablespoon scoop ensures uniform size and consistent set times — and helps the batch look professional on a tray.
My favorite part is watching people pick one up and smile at the retro familiarity of the snack cake reimagined. These truffles combine childhood flavor memory with adult-level presentation, and the contrast between the creamy center and crisp shell always gets compliments at holiday gatherings.
Storage Tips
Store finished truffles in a single layer or separated by parchment in an airtight container in the refrigerator for up to one week. If stacking is necessary, place parchment between layers to prevent sticking. For longer storage, freeze in a rigid container for up to three months; freeze in a single layer first until solid to avoid deformation, then transfer to a sealed container. To serve, move to the refrigerator for a few hours to thaw slowly — quick thawing at room temperature can make the centers soft and compromise the coating.
Ingredient Substitutions
If you prefer a chocolate version, swap the vanilla almond bark for milk or dark chocolate coating and use the chocolate variety of the snack cakes. For nut-aware gatherings, choose a generic vanilla coating instead of almond bark. To make these slightly less sweet, substitute half the red candy melts with melted bittersweet chocolate for the drizzle. Note: substituting low-fat cream cheese will change texture and make centers looser; if you must, add a tablespoon of powdered sugar to help firm the mixture.
Serving Suggestions
Arrange these on a festive platter with sprigs of rosemary or sugared cranberries for contrast. They pair beautifully with a pot of hot cocoa, coffee, or a winter-spiced tea. For cookie exchanges, place in mini cupcake liners and nestle into a velvet-lined tin for gifting. If serving at a party, provide small dessert forks or toothpicks — guests appreciate not getting sticky fingers when the coating softens slightly after being out for a while.
Cultural Background
This recipe is a modern holiday riff rooted in American snack culture — taking a boxed seasonal cake and elevating it into a truffle aligns with the long tradition of repurposing sweets for special occasions. Cake balls and truffles grew popular as a way to stretch desserts and present bite-sized treats for parties, and the use of seasonal snack cakes ties into nostalgia-driven holiday baking where familiar flavors are reframed as gifts.
Seasonal Adaptations
For winter parties, keep the classic green sugar and red drizzle. For a New Year’s variation, swap the green sprinkles for gold sanding sugar and use champagne-flavored candy melts for a subtle celebratory note. In summer, freshen the truffles by coating in white chocolate and topping with toasted coconut or freeze-dried fruit powder for brightness. The technique stays the same — only the decoration and coating change to reflect the season.
Meal Prep Tips
Make these centers up to two weeks ahead: form the balls, flash-freeze on a sheet, then store frozen in a resealable bag. When ready to gift or serve, dip them while still frozen for cleaner shells and faster set times. Keep a small station with warmed coating, a fork, and a chilled tray so you can dip many at once. Label gift boxes with allergy info and date made to keep recipients informed.
These little truffles are the kind of simple, cheer-filled treat that become a recurring favorite — easy to scale, easy to wrap, and always a delight to unwrap and share. Try them once and they’ll likely become part of your holiday baking rotation.
Pro Tips
Use a one-tablespoon scoop for uniform sizing and even chilling times.
Freeze the formed balls until firm before dipping to get a smooth, clean coating.
Melt candy coatings in short microwave bursts and stir between each burst to avoid overheating.
If the coating thickens while working, reheat in 10–15 second bursts and stir to return to fluid consistency.
Line trays with parchment to prevent sticking and for quick cleanup.
This nourishing christmas tree cake truffles recipe is sure to be a staple in your kitchen. Enjoy every moist, high protein slice — it is perfect for breakfast or as a wholesome snack any time.
FAQs about Recipes
How should I store the truffles?
Store in an airtight container in the refrigerator for up to 1 week or freeze for up to 3 months. Thaw in the fridge before serving.
Can I use whipped cream cheese?
Use brick-style full-fat cream cheese. Whipped spreads contain more water and can make the centers too loose.
Tags
Christmas Tree Cake Truffles
This Christmas Tree Cake Truffles recipe makes perfectly juicy, tender, and flavorful steak every time! Serve with potatoes and a side salad for an unforgettable dinner in under 30 minutes.
Ingredients
Main
Instructions
Prepare the snack cake crumbs
Unwrap all snack cakes and place in a large bowl. Break into small pieces by hand or pulse in a food processor until coarse crumbs form. Aim for uniform texture with no big chunks.
Mix with cream cheese
Add 8 ounces of softened brick-style cream cheese to the crumbs and beat with an electric mixer until smooth and fully combined, about 1–2 minutes. Scrape down bowl sides as needed.
Portion and roll
Use a one-tablespoon scoop to portion mixture, then roll each portion between your palms into tight balls. Place on a parchment-lined sheet tray spaced about 1/2 inch apart.
Freeze until firm
Freeze the shaped balls for 30–60 minutes until firm but not rock-hard. This step helps the centers hold shape during dipping.
Melt the almond bark
Melt vanilla almond bark according to package directions, either in short microwave bursts stirring between each or over a double boiler until smooth and glossy.
Dip and decorate
Dip each frozen ball into the melted coating using a fork, let excess drip off, then return to parchment. Immediately sprinkle with green sugar before the coating sets.
Drizzle with candy melts
Melt red candy melts and drizzle over the coated truffles using a fork or piping bag. Allow coating to fully harden at room temperature or chill briefly.
Store
Store in an airtight container in the refrigerator for up to one week or freeze for up to three months. Thaw in the fridge before serving.
Last Step: Please leave a rating and comment letting us know how you liked this recipe! This helps our business to thrive and continue providing free, high-quality recipes for you.
Nutrition
Did You Make This?
Leave a comment & rating below or tag
@yummique on social media!
Categories:
You might also like...

Cheesy Zucchini Rollatini Bake
Tender grilled zucchini wraps basil ricotta, bathed in marinara and mozzarella, baking into a bubbly, lighter Italian comfort dinner ready in 30 minutes.

Air Fryer Zucchini and Squash
Crisp-edged, tender-in-the-middle zucchini and yellow squash made in 15 minutes with pantry spices. A vibrant, veggie-forward side everyone devours.

Chicken Meatball Parmesan
Tender chicken meatballs simmered in rich marinara and blanketed with melty mozzarella, bringing all the flavors of chicken parm in cozy, bite-sized form.
Did You Make This?
Leave a comment & rating below or tag @yummique on social media!
Rate This Recipe
Share This Recipe
Enjoyed this recipe? Share it with friends and family, and don't forget to leave a review!
Comments (1)
This recipe looks amazing! Can't wait to try it.
Comments are stored locally in your browser. Server comments are displayed alongside your local comments.

Hi, I'm Amira!
What's Popular

30-Minute Meals!
Join to receive our email series which contains a round-up of some of our quick and easy family favorite recipes.