
>>

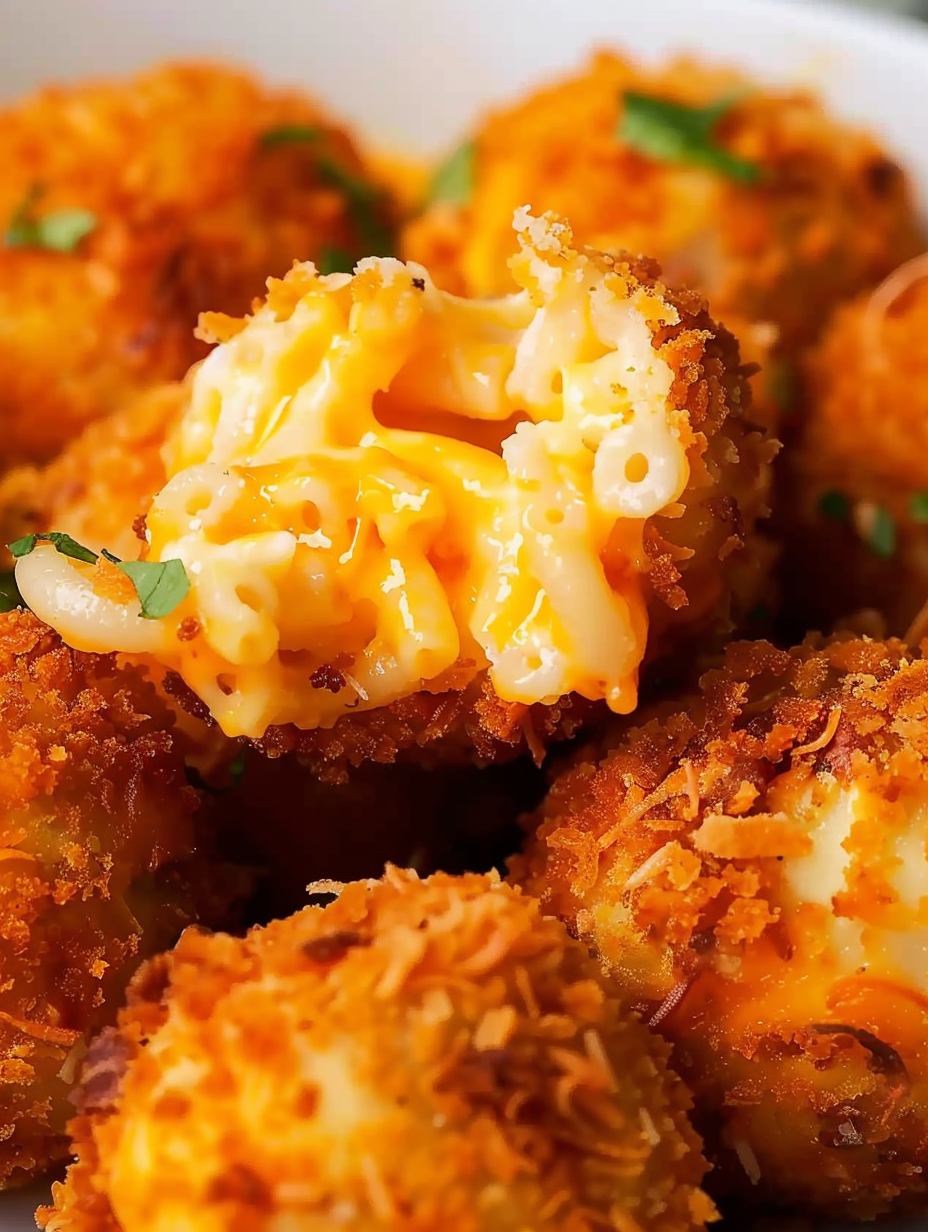
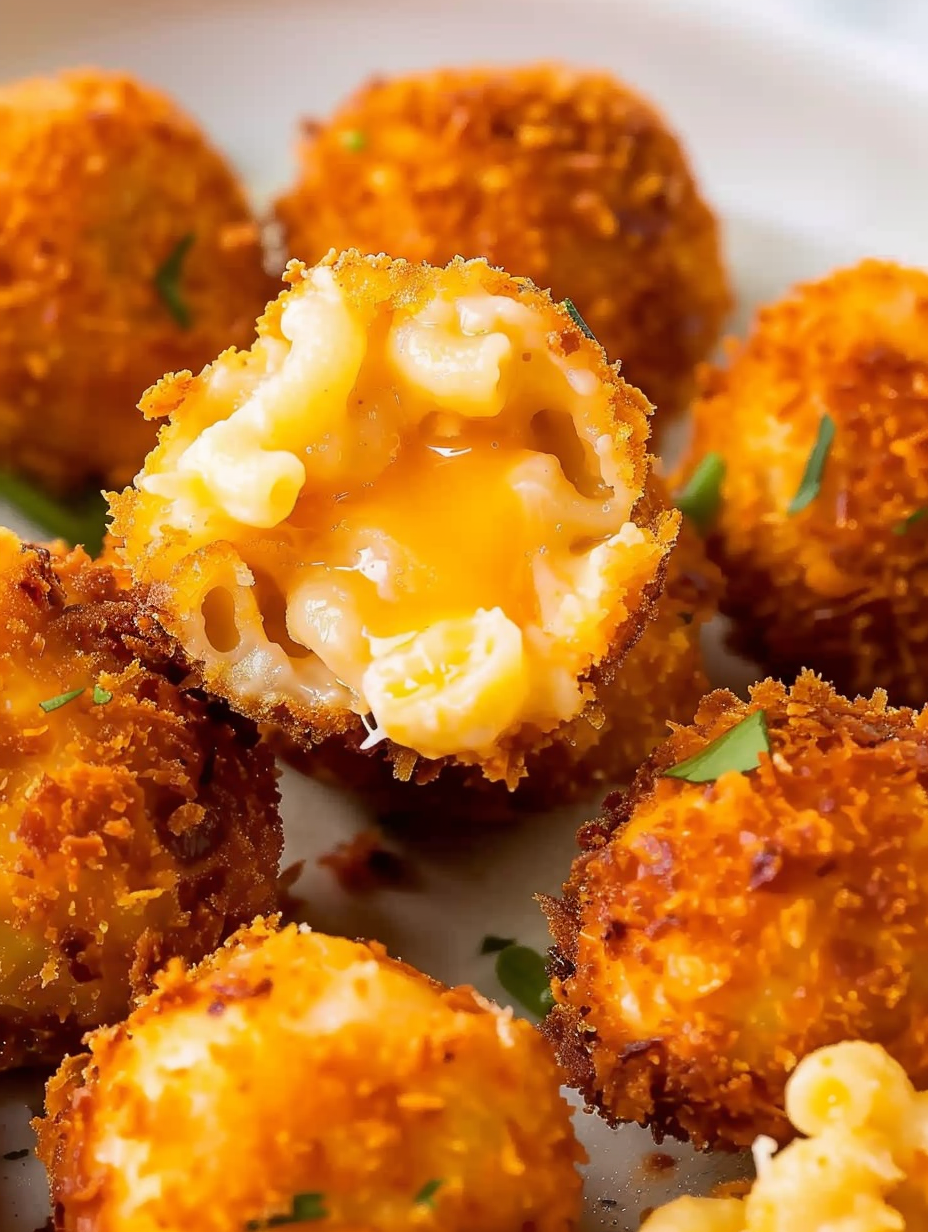
Leftover mac and cheese transformed into crunchy, golden bites with molten cheesy centers. Perfect for parties, snacks, or a comforting starter.

This recipe for Crispy Mac and Cheese Balls has been my go-to way to rescue leftover macaroni and cheese and turn it into something everyone fights over. I discovered this trick one weekend when I had more mac than we could eat, and instead of tossing it, I chilled it, rolled it, and fried it. The first batch came out perfectly crisp on the outside and decadently gooey inside, and it instantly became a party favorite. Every time I make a fresh pot of mac, I secretly plan to double the batch so I can make these the next day.
What makes these so special is the contrast of textures and the comforting, familiar flavor reframed into a handheld bite. The exterior needs to be dry and well-coated so it shatters on the first bite while the interior should remain creamy, cheesy, and warm. I usually serve them with a tangy dipping sauce to cut through the richness. They are great as an appetizer for a crowd, a side for casual dinners, or a fun main for kids. The method is forgiving, and with a few small tips you will get consistently golden, non-greasy results.
My family always asks for these at gatherings. At a backyard cookout they vanished within moments, and guests kept asking for the recipe. I love how a humble pan of mac becomes a conversation starter and a nostalgia-filled bite that reminds everyone of childhood snacks but elevated with better cheese and texture.
What I love most is how adaptable they are. At family gatherings I have swapped cheeses and added mix-ins like bacon or jalapeño and everyone still devours them. They are a nostalgic update to a classic comfort flavor and a simple way to make leftovers feel celebratory.
Store leftover fried bites in an airtight container in the refrigerator for up to 2 days. To maintain crispness, reheat in a 375 degrees F oven on a wire rack over a baking sheet for 8 to 10 minutes rather than using the microwave. Un-fried, shaped and coated balls freeze well on a tray until solid, then transfer to a freezer bag for up to 3 months. Fry from frozen and increase the frying time by 1 to 2 minutes, watching that the interior heats through without burning the crust.
If you need to adapt, use a blend of cheeses for deeper flavor: fontina or Gruyere melts beautifully and pairs with cheddar. For a gluten-free option substitute gluten-free panko or crushed gluten-free crackers for the breadcrumbs and ensure any pre-shredded cheese is gluten-free. For a lighter finish, bake at 425 degrees F for 12 to 15 minutes turning once, though frying yields a superior crisp. Replace whole milk mac with a slightly drier version so the balls hold their shape.
Present these with a trio of dipping sauces for variety: classic marinara, a tangy sriracha mayo, and honey mustard. Garnish with chopped chives or finely grated Parmesan for color and bite. Serve alongside a crisp salad to balance richness or add to a game-day platter with sliders and wings. For a cozy dinner, pair with roasted vegetables and a crisp white wine such as Sauvignon Blanc to cut through the cheese.
Macaroni and cheese has roots in European pasta dishes and became an American classic through comfort-food traditions. Turning leftovers into fried morsels nods to both Southern frying techniques and party-food culture where fried, bite-sized versions of staples become communal snacks. These bites are a contemporary twist that celebrate thrift and indulgence simultaneously and reflect a longstanding culinary ethos: reinventing leftovers into new, craveable forms.
During cooler months, add warming spices into the mac such as a pinch of smoked paprika or cayenne for depth. Fall parties can welcome pumpkin spice accents in small amounts or swap in a sharper cheddar. Summer versions benefit from fresh additions like chopped roasted red pepper or basil stirred into the mac before chilling. For holidays, fold in small cooked bacon pieces or chopped roasted chestnuts for texture and festive flavor.
Prepare several pans of mac, chill thoroughly, and form into balls on a baking sheet. Freeze on the sheet, then store in labeled freezer bags for easy future frying. For party day, fry batches quickly while guests arrive and keep warm on a baking sheet in a low oven. Portion into small bowls with toothpicks and dipping sauces to encourage grazing and keep service stress-free.
These bites are an invitation to be playful with comfort food. Whether you are rescuing leftovers or crafting them intentionally, they bring warmth, crunch, and a little bit of culinary showmanship to any table. Make a double batch and watch them disappear.
Chill the mac and cheese thoroughly before shaping to ensure firm balls that hold together.
Use panko breadcrumbs for a lighter, crispier crust that resists oil absorption.
Monitor oil temperature with a candy thermometer and maintain 350 degrees F during frying.
Grate cheese from a block when possible to avoid anti-caking agents that affect melt and texture.
This nourishing crispy mac and cheese balls recipe is sure to be a staple in your kitchen. Enjoy every moist, high protein slice — it is perfect for breakfast or as a wholesome snack any time.
Yes. Shape and coat the balls, freeze them solid on a tray, then transfer to a freezer bag. Fry from frozen, adding 1 to 2 minutes to the frying time.
Keep oil at 350 degrees F and do not overcrowd the pot. Fry in small batches and drain on paper towels before serving.
This Crispy Mac and Cheese Balls recipe makes perfectly juicy, tender, and flavorful steak every time! Serve with potatoes and a side salad for an unforgettable dinner in under 30 minutes.
Refrigerate the macaroni and cheese for at least 3 to 4 hours until very firm so it can be easily scooped and rolled without collapsing.
Stir in extra shredded cheddar and Parmesan to firm up the mixture and improve flavor. Taste and adjust seasoning if necessary.
Whisk eggs with milk for the egg wash and place breadcrumbs in a separate shallow bowl for coating.
Scoop and roll roughly 15 even balls, compacting gently so they hold together. Place on a parchment-lined baking sheet.
Dip each ball in egg wash, dredge in breadcrumbs, and refrigerate on the tray for at least 30 minutes to set the coating.
Heat oil to 350 degrees F and fry 4 to 5 balls at a time for about 3 to 4 minutes until golden and crispy. Drain on paper towels before serving.
Last Step: Please leave a rating and comment letting us know how you liked this recipe! This helps our business to thrive and continue providing free, high-quality recipes for you.
Leave a comment & rating below or tag
@yummique on social media!

Tender grilled zucchini wraps basil ricotta, bathed in marinara and mozzarella, baking into a bubbly, lighter Italian comfort dinner ready in 30 minutes.

Crisp-edged, tender-in-the-middle zucchini and yellow squash made in 15 minutes with pantry spices. A vibrant, veggie-forward side everyone devours.

Tender chicken meatballs simmered in rich marinara and blanketed with melty mozzarella, bringing all the flavors of chicken parm in cozy, bite-sized form.
Leave a comment & rating below or tag @yummique on social media!
Enjoyed this recipe? Share it with friends and family, and don't forget to leave a review!
This recipe looks amazing! Can't wait to try it.
Comments are stored locally in your browser. Server comments are displayed alongside your local comments.

Join to receive our email series which contains a round-up of some of our quick and easy family favorite recipes.
