
>>

Crisp, simple, and irresistible homemade baked potato chips — just potatoes, a little olive oil, and salt. Ready in 30 minutes and far healthier than store-bought.

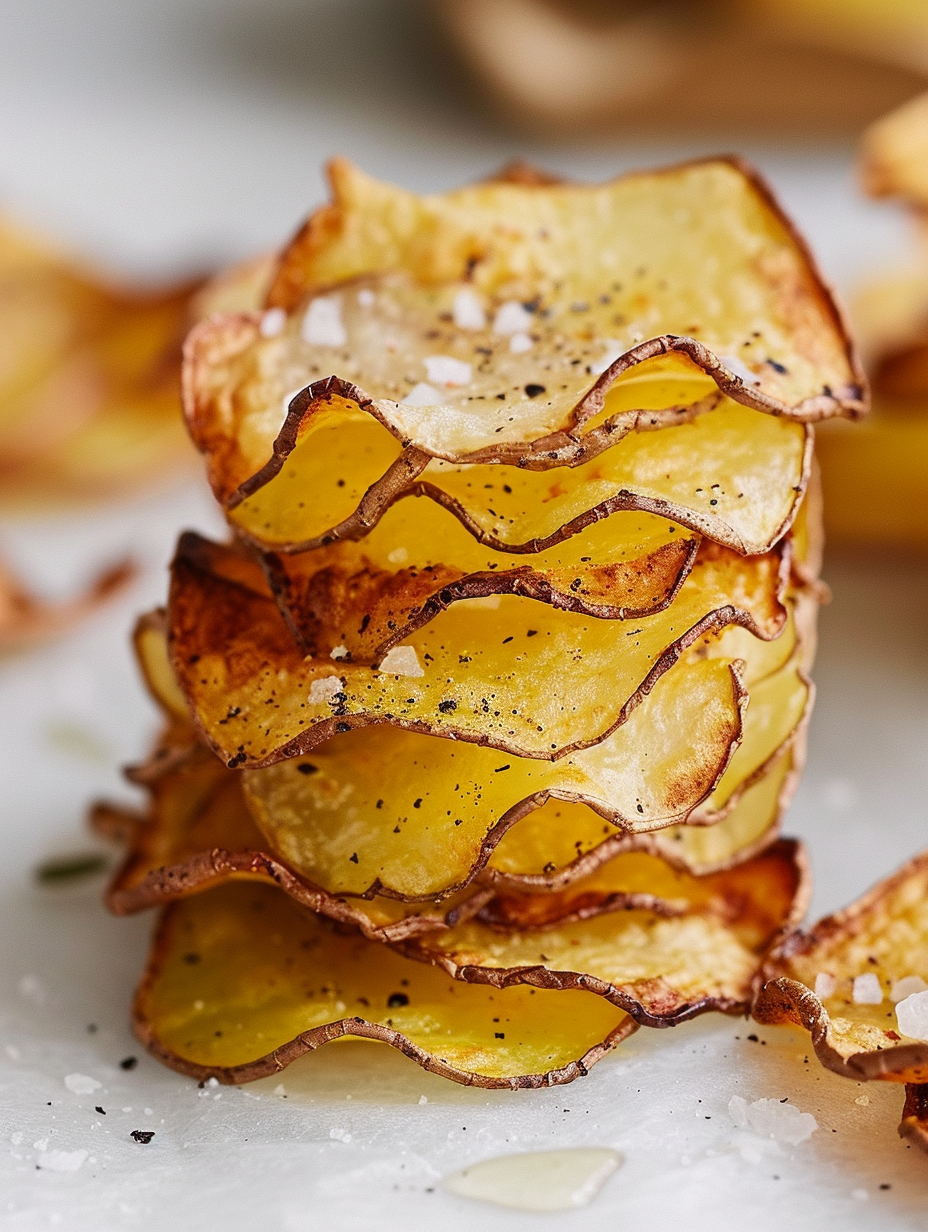
This recipe for homemade baked potato chips is one of those small kitchen victories that feels deceptively simple and wildly satisfying. I first made these on a lazy Sunday afternoon when the snack drawer was empty and the pantry had nothing but a couple of gold potatoes and a jar of olive oil. The first batch came out crisp and golden, and my partner declared them better than anything in a bag — we’ve not looked back since. They’re light, slightly salty, and have that perfect snap that makes you reach for one more.
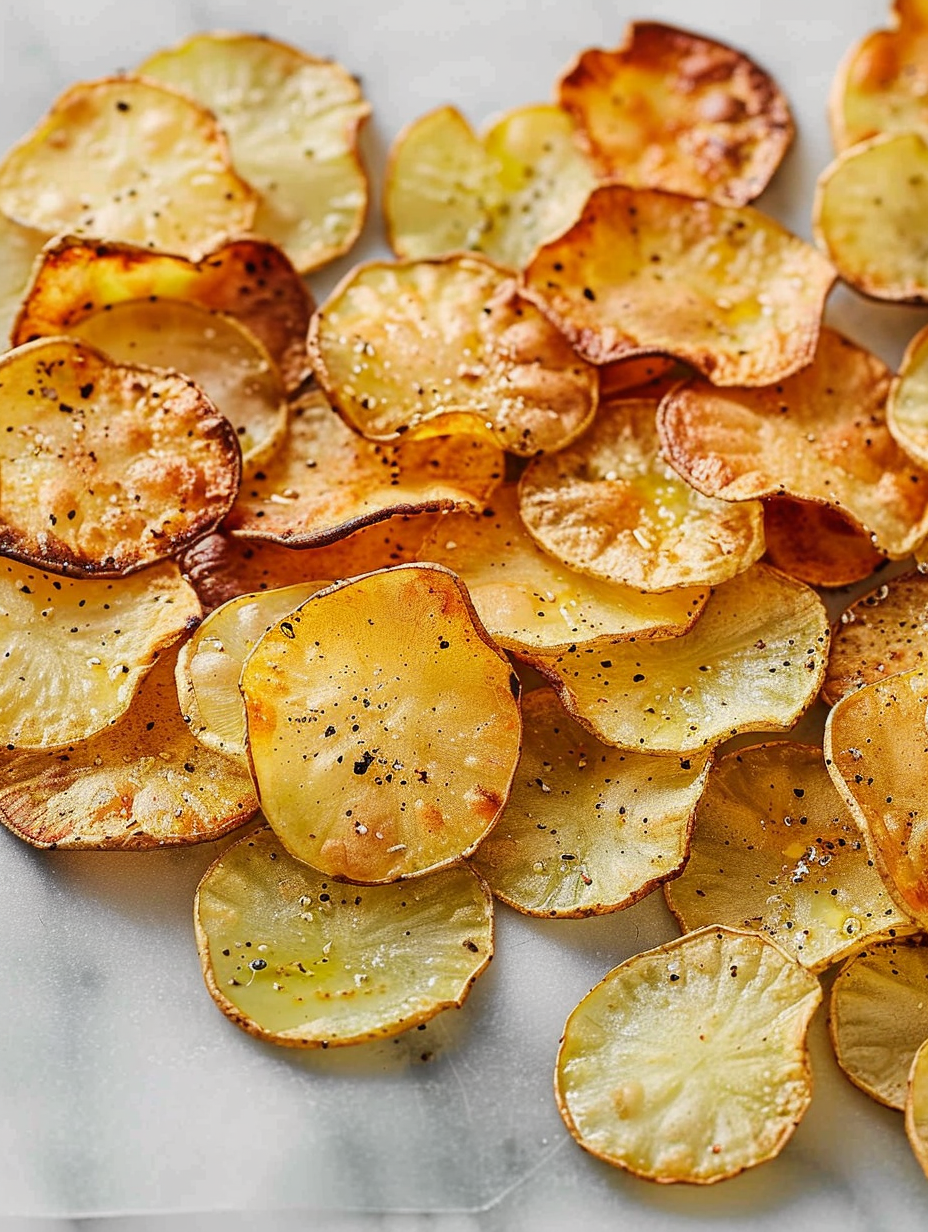
What I love about this preparation is how straightforward the technique is: thin, even slicing, a light coating of oil, and careful roasting at 400 F. The texture is delicate yet crunchy, and the flavor is a clean potato note with the gentle richness of olive oil and the bite of Himalayan salt. These chips are perfect for afternoon nibbling, a picnic, or as a crunchy side to a hearty sandwich. Because they’re baked instead of fried, they feel healthier without sacrificing that satisfying crisp.
From my experience, family and guests always ask for the “secret” — there isn’t one, just attention to thin, even slicing and careful watching in the oven. I often make two trays at once; one disappears during that first cooling period while the other lasts a bit longer. These chips have become our go-to when we want a homemade snack that still feels like a treat.
My favorite part of this preparation is the ritual of slicing and seasoning while the oven preheats. Guests comment on the fresh potato flavor — it’s honest and simple. I once served these at a backyard party and an older neighbor asked for the recipe, surprised that something this good could be homemade and so straightforward.
To keep the chips crisp, let them cool completely before storing. Transfer cooled chips to an airtight container or a glass jar with a tight lid; place a piece of paper towel inside to absorb any residual moisture. Store at room temperature up to 48 hours — beyond that they may soften. Do not refrigerate, as humidity will make them limp. If they lose a bit of crunch, reheat on a baking sheet at 325 F for 4–6 minutes to refresh.
If you don’t have gold potatoes, russets or red potatoes work but expect differences: russets yield a drier, fluffier chip and may require slightly more oil for browning; reds have thinner skins so they crisp faster and give a lighter texture. Swap olive oil for avocado oil for a neutral flavor and higher smoke point. For lower sodium, omit the salt during baking and sprinkle a minimal amount of salt substitute at the table. For a gluten-free crunch with a twist, dust slices lightly with nutritional yeast before baking for a savory, cheese-like note without dairy.
Serve these chips alongside sandwiches, wraps, or a fresh green salad. They pair beautifully with creamy dips like hummus, yogurt-free cashew dip, or a simple smashed avocado. For a party, present them in small bowls with a trio of seasonings at the side — flakey sea salt, smoked paprika, and a spicy cayenne mix allow guests to customize. Garnish with a few sprigs of fresh rosemary or thyme for a rustic touch.
Thinly sliced and fried potato snacks have been enjoyed across many cultures, but the baked version reflects a modern preference for lighter preparations. Baked chips emerged as a home-cooking adaptation to traditional fried crisps — transforming pantry staples into healthier snacks. This simple method draws on the universal love of potatoes, showcasing how small technique adjustments produce a feel-good, homemade alternative to mass-produced options.
Adapt the seasonings to the time of year: in summer, toss warm chips with a sprinkle of lemon zest and sea salt for brightness; in autumn, use smoked paprika and a pinch of cinnamon for a warm, spiced character; during the holidays, rosemary and coarse sea salt make the chips festive and aromatic. You can also switch to sweet potatoes for an autumnal variation — adjust baking times and watch closely since sweet potatoes brown faster.
For easy snack prep, slice potatoes and pat dry the night before, then store the slices in a single layer on a tray covered with plastic wrap in the fridge for up to 12 hours. When ready to bake, bring them to room temperature and continue with oiling and seasoning. If making a large batch for a gathering, bake on multiple sheets rotated through the oven to ensure even heat distribution; cool completely before storing to maintain crispness.
These baked chips have become a small pleasure we turn to often — they are simple enough for a weeknight and special enough for company. I encourage you to make a double batch the first time; you’ll likely eat most of them immediately, but you’ll also be glad to have extras to share.
Slice potatoes as uniformly as possible (about 1/16 inch) to ensure even cooking and consistent crispness.
Pat slices completely dry before oiling to remove surface moisture that prevents browning.
Arrange slices in a single layer and avoid overlap — touching chips steam instead of crisping.
Flip chips halfway through baking and remove any that brown faster to prevent burning.
Let chips cool fully on a rack or sheet for 2–5 minutes; they crisp up as they cool.
This nourishing homemade baked potato chips recipe is sure to be a staple in your kitchen. Enjoy every moist, high protein slice — it is perfect for breakfast or as a wholesome snack any time.
This Homemade Baked Potato Chips recipe makes perfectly juicy, tender, and flavorful steak every time! Serve with potatoes and a side salad for an unforgettable dinner in under 30 minutes.
Preheat oven to 400 F. Line a rimmed baking sheet with parchment paper or a silicone mat. Position the rack in the center for even air circulation.
Slice potatoes to about 1/16 inch using a mandolin, food processor attachment, or a very sharp knife. Pat slices dry to remove surface moisture so they will crisp.
Place slices in a bowl, drizzle with 2 teaspoons olive oil and toss gently to coat. Alternatively, brush oil on the slices on the sheet. Lightly sprinkle Himalayan salt.
Lay slices in a single layer so they don't touch. Bake 10 minutes, flip each chip, then bake another 7–9 minutes until golden and edges darken slightly. Remove chips individually if they finish early.
Let chips cool for 2–5 minutes to crisp further. Taste and add more salt if desired. Store cooled chips in an airtight container at room temperature up to 48 hours.
Last Step: Please leave a rating and comment letting us know how you liked this recipe! This helps our business to thrive and continue providing free, high-quality recipes for you.
Leave a comment & rating below or tag
@yummique on social media!

Tender grilled zucchini wraps basil ricotta, bathed in marinara and mozzarella, baking into a bubbly, lighter Italian comfort dinner ready in 30 minutes.

Crisp-edged, tender-in-the-middle zucchini and yellow squash made in 15 minutes with pantry spices. A vibrant, veggie-forward side everyone devours.

Tender chicken meatballs simmered in rich marinara and blanketed with melty mozzarella, bringing all the flavors of chicken parm in cozy, bite-sized form.
Leave a comment & rating below or tag @yummique on social media!
Enjoyed this recipe? Share it with friends and family, and don't forget to leave a review!
This recipe looks amazing! Can't wait to try it.
Comments are stored locally in your browser. Server comments are displayed alongside your local comments.

Join to receive our email series which contains a round-up of some of our quick and easy family favorite recipes.
