
>>

Six-ingredient, vegan, no-bake mini Biscoff cheesecakes — dreamy, creamy and perfect for parties or an indulgent weeknight treat.
This recipe for mini no-bake Biscoff cheesecakes has been one of my most-requested treats since I first made them on a rainy afternoon when company dropped by unexpectedly. I discovered the balance of crunchy cookie, silky dairy-free filling and that little hit of spiced caramel from the Biscoff spread by accident when trying to adapt a classic cheesecake to a fully plant-based, no-bake version. The result was so addictive my friends called back the next day asking for the recipe. These tiny indulgences are creamy without being heavy, rich without feeling cloying, and the push-up cookie cup makes each bite delightfully portable.
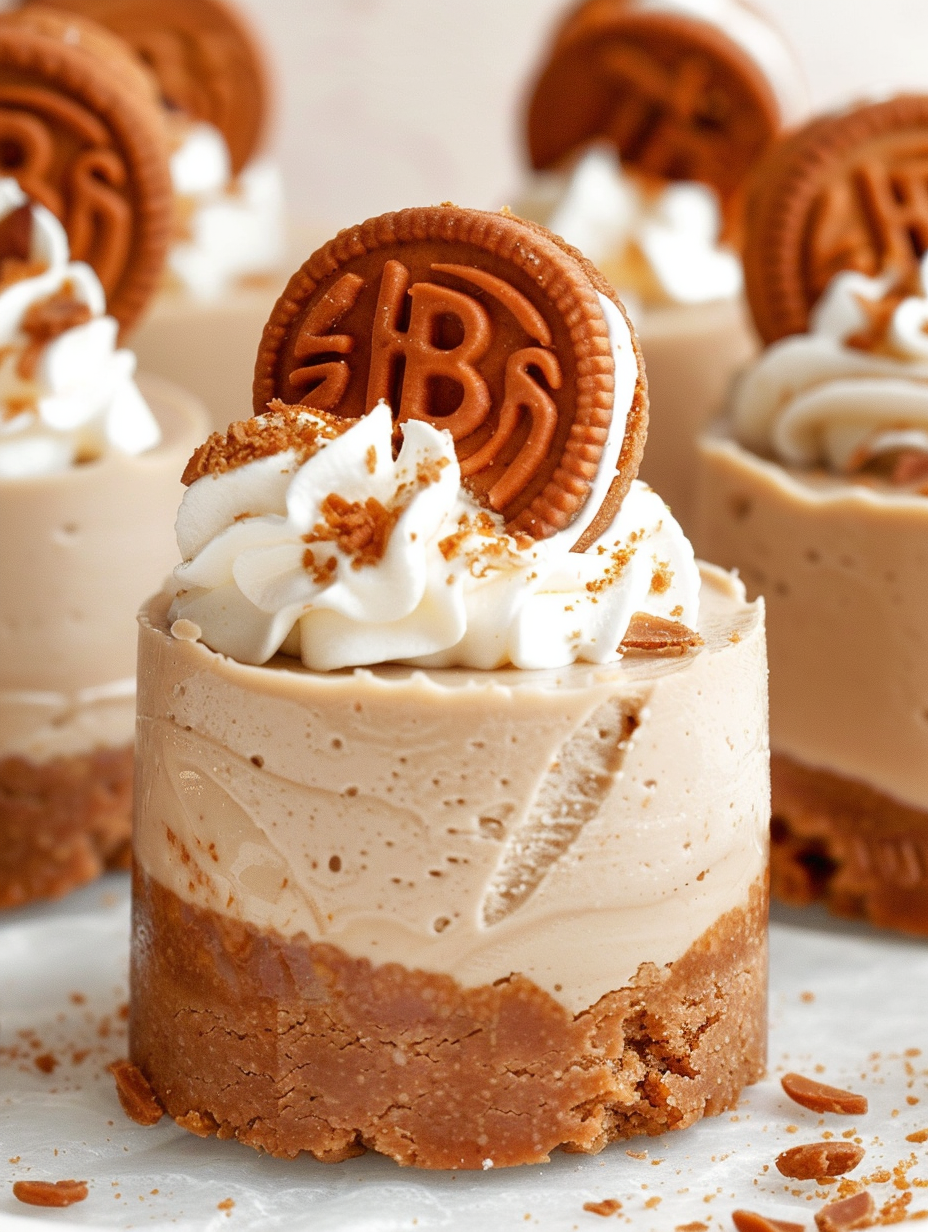
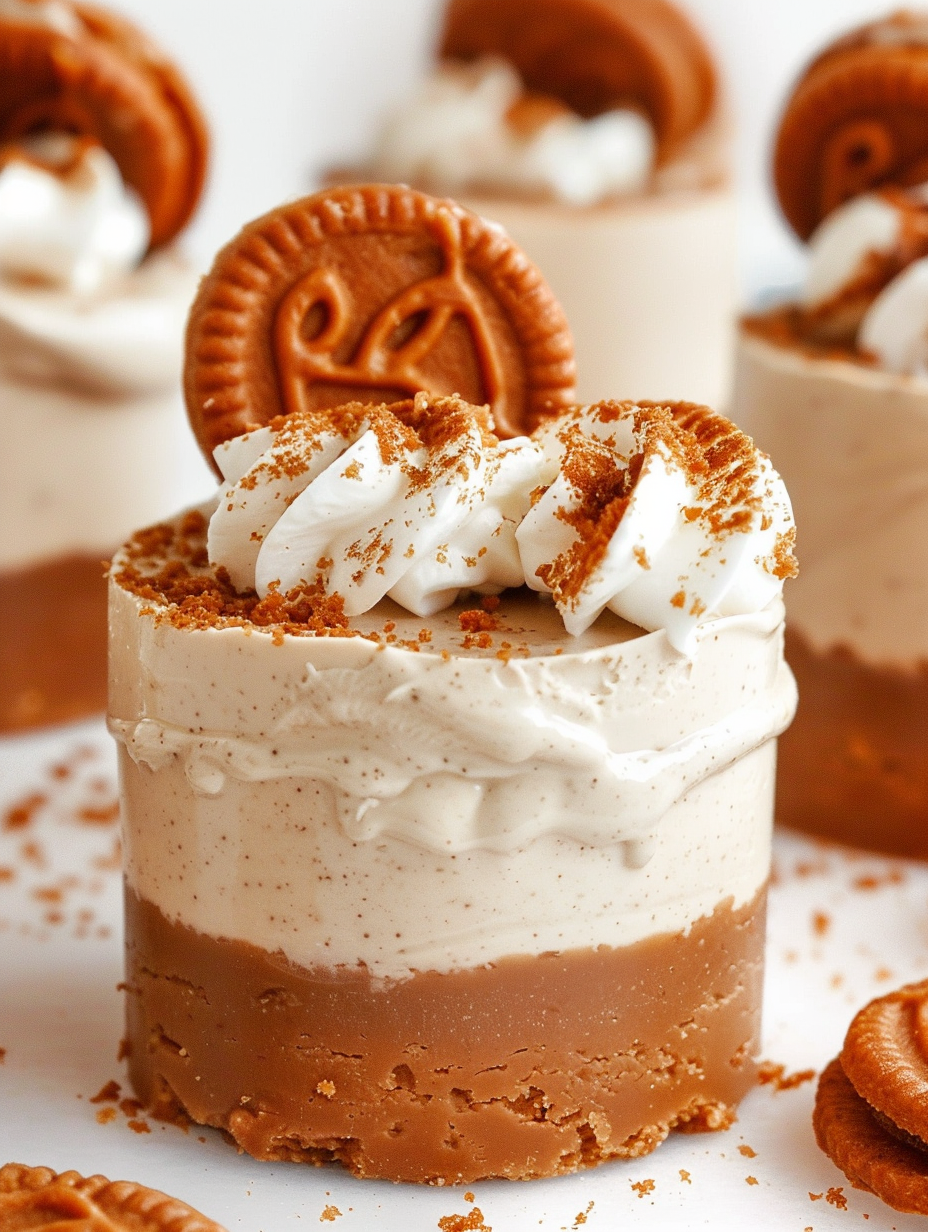
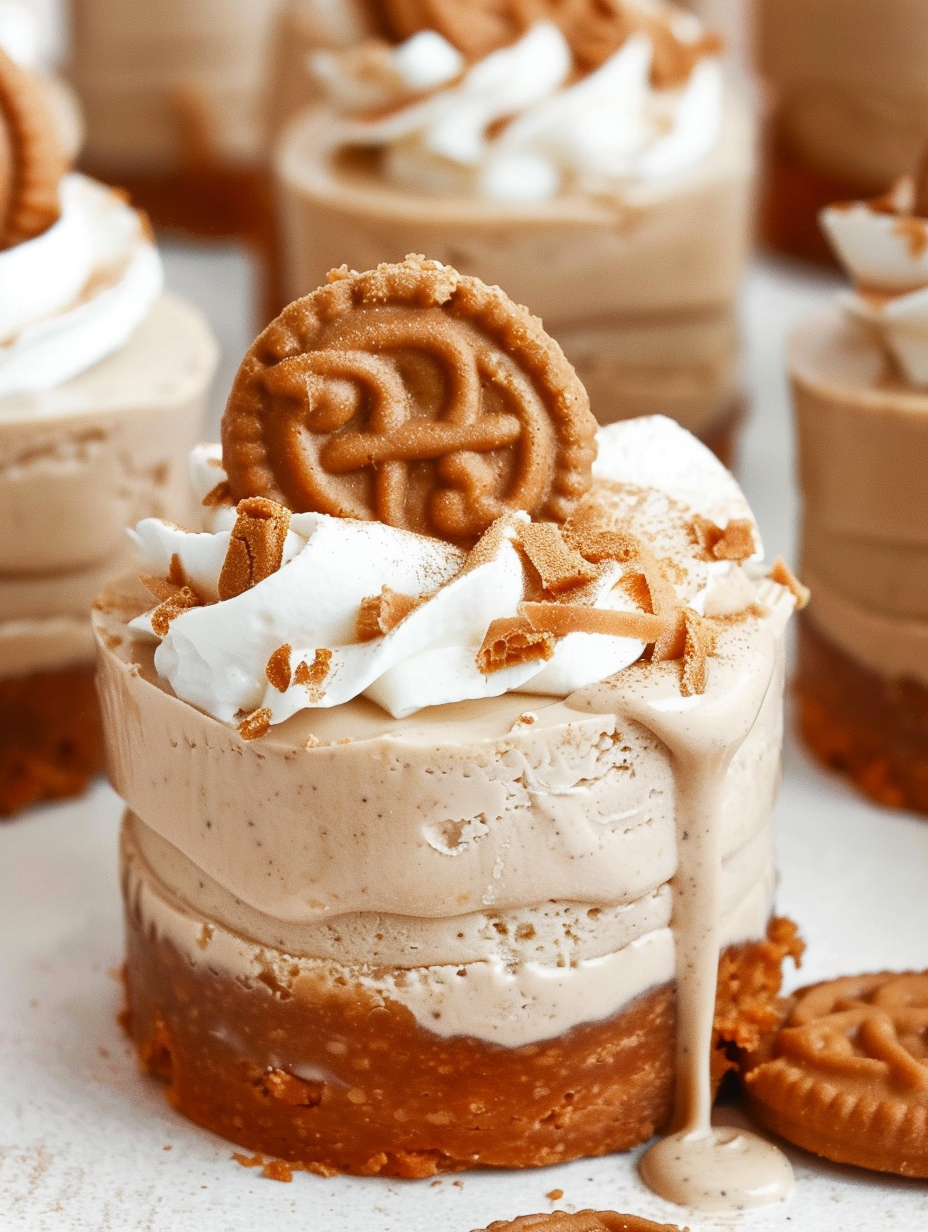
What makes these special is the texture contrast: the compacted cookie cup holds up to the light, whipped filling while a ribbon of melted Biscoff spread gives the middle an almost molten, biscuity surprise. I learned to freeze them briefly to get a clean release from the tins and to always use a stable plant-based double cream — Elmlea Plant Based Alternative Double Cream works brilliantly to create a sturdy, airy whip. Over the years these have become my go-to when I need an impressive dessert with minimal fuss: they travel well, can be made ahead, and are consistently the first thing to disappear at gatherings.
I remember serving these at a small dinner and watching even the most skeptical of my friends come back for seconds. The combination of crunchy cup, whipped filling and melted Biscoff ribbon is unexpectedly comforting — like an upgraded childhood biscuit-and-spread moment. They feel celebratory yet simple, and that balance is why I keep making them.
My favourite part is how reliably these impress guests. I’ve sent them to potlucks and birthday tables where they arrived frozen and were fully defrosted and perfect by dessert time. The push-up tins make them feel playful, and that little ribbon of molten Biscoff is always the talk of the table.
Store these in the refrigerator in an airtight container for up to 3 days; if frozen, keep them in a freezer-safe container for up to 3 months. When stacking, use parchment paper between layers to prevent sticking. For transport, place them in a chilled insulated bag with ice packs and remove the packs an hour before serving to allow partial defrosting. If you need to firm them up quickly, a 20–30 minute stint in the freezer will tighten the texture without fully freezing the centre.
If you can’t find Biscoff biscuits, speculoos-style cookies or crushed graham crackers with a pinch of cinnamon can work — adjust the sugar level if needed. For the Biscoff spread, a cookie butter substitute or smooth peanut butter mixed with a teaspoon of cinnamon can mimic the flavor. For cream cheese, any thick, high-fat vegan variety works best; avoid low-fat spreads which can make the filling too thin. If you must use canned full-fat coconut cream, chill it thoroughly and use only the solidified top layer, but be aware it may carry a coconut flavor.
Present these on a platter with fresh berries and mint sprigs to cut through the sweetness. They pair beautifully with black coffee or a bright citrusy tea. For a party, set them on individual dessert spoons for a canapé-style serving or offer mini spoons in push-up tins for guests to enjoy standing up. A sprinkle of flaky sea salt on the melted Biscoff drizzle creates a lovely contrast and elevates the caramel notes.
Biscoff biscuits, sometimes called speculoos, originated in Belgium and have become a modern pantry essential for their caramelized, spiced profile. The idea of a no-bake, chilled creamy dessert is global — mirrorless cheesecakes and chilled tarts are popular in many European traditions. Transforming that flavor into a vegan, no-bake miniature celebrates both the cookie’s heritage and modern plant-based adaptations that retain texture and richness without dairy.
In autumn, stir a pinch of freshly grated nutmeg and ground ginger into the crumbs for a deeper spice profile. For summer, top each cheesecake with a thin slice of grilled peach or a spoonful of bright raspberry compote. At holiday time, swap plain Biscoff biscuits for a spiced or ginger biscuit and add a toasted pecan on top for crunch and festive flair.
Make the bases and filling a day ahead and store separately in the fridge. Assemble and freeze on the day you need them; released from the tins while chilled, they’re ready to decorate an hour before serving. Use piping bags to portion the filling quickly and consistently — this saves cleanup and gives a professional finish. Keep extra melted Biscoff in a small sealed jar in the fridge and gently warm to drizzle on serving day.
These mini no-bake Biscoff cheesecakes are small in size but big on joy — whether you’re making them for a crowd or keeping them as a weekend treat, they reward patience with an irresistibly creamy, biscuit-laden bite. Give them a try, make them your own, and enjoy the ripple of smiles they bring to the table.
Compact the crumb base firmly into the tin to avoid crumbling when unmolding.
Use a stable plant-based double cream (like Elmlea) to ensure the filling whips and holds peaks.
Freeze until the cheesecakes are fully firm before attempting to release from push-up tins.
Warm the Biscoff drizzle gently; hot spread can melt the filling, so drizzle while the cakes are still chilled.
This nourishing mini no-bake biscoff cheesecakes recipe is sure to be a staple in your kitchen. Enjoy every moist, high protein slice — it is perfect for breakfast or as a wholesome snack any time.
This Mini No-Bake Biscoff Cheesecakes recipe makes perfectly juicy, tender, and flavorful steak every time! Serve with potatoes and a side salad for an unforgettable dinner in under 30 minutes.
Gently melt 3 1/2 tablespoons dairy-free butter over low heat. Blitz 1 1/2 cups Biscoff biscuits until fine. Mix crumbs with melted butter until the texture resembles wet sand and holds when pressed.
Press roughly 1.8 ounces of the crumb mixture into each cavity of a push-up cookie cup tin, compacting firmly. Chill the tray in the freezer while preparing the filling to ensure the cups hold their shape.
In a bowl, whip just under 1 cup dairy-free whipping cream with 5 1/2 ounces dairy-free cream cheese, starting on low then increasing to high until thick peaks form (about 4–6 minutes). Fold in blitzed biscuits and 2 heaped tablespoons Biscoff spread.
Pipe the filling into chilled cookie cups, smoothing the tops. Add about 1 1/2 teaspoons of Biscoff spread to the center of each for a gooey ribbon. Return to the freezer to set for at least 4 hours.
Once firm, release from tins (use push-up bases). Warm 2 tablespoons of Biscoff spread and drizzle on each chilled cake. Whip 2 tablespoons dairy-free cream and pipe a small swirl, then garnish with a whole biscuit and crumbs. Thaw in the fridge 1–2 hours before serving.
Last Step: Please leave a rating and comment letting us know how you liked this recipe! This helps our business to thrive and continue providing free, high-quality recipes for you.
Leave a comment & rating below or tag
@yummique on social media!

Tender grilled zucchini wraps basil ricotta, bathed in marinara and mozzarella, baking into a bubbly, lighter Italian comfort dinner ready in 30 minutes.

Crisp-edged, tender-in-the-middle zucchini and yellow squash made in 15 minutes with pantry spices. A vibrant, veggie-forward side everyone devours.

Tender chicken meatballs simmered in rich marinara and blanketed with melty mozzarella, bringing all the flavors of chicken parm in cozy, bite-sized form.
Leave a comment & rating below or tag @yummique on social media!
Enjoyed this recipe? Share it with friends and family, and don't forget to leave a review!
This recipe looks amazing! Can't wait to try it.
Comments are stored locally in your browser. Server comments are displayed alongside your local comments.

Join to receive our email series which contains a round-up of some of our quick and easy family favorite recipes.
