
>>

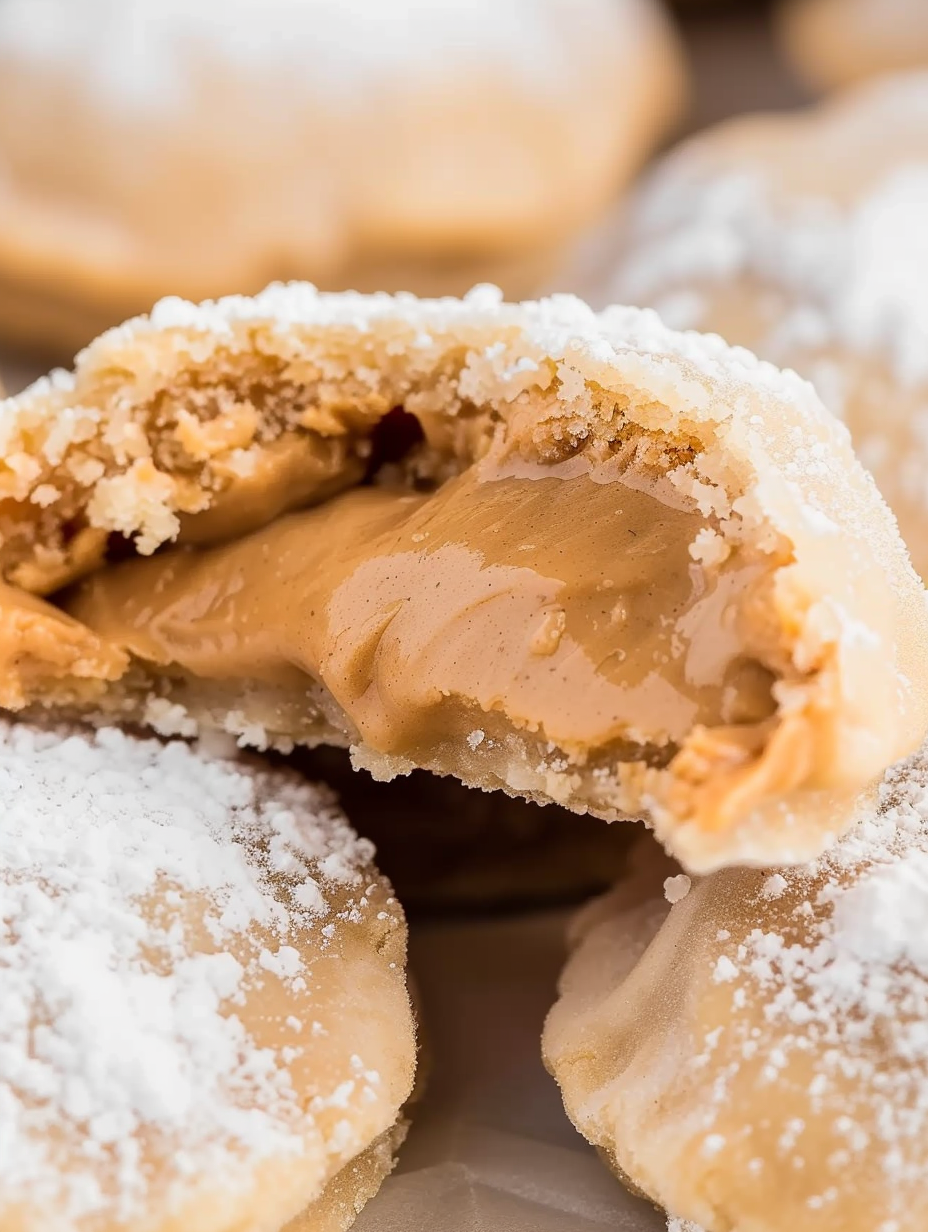
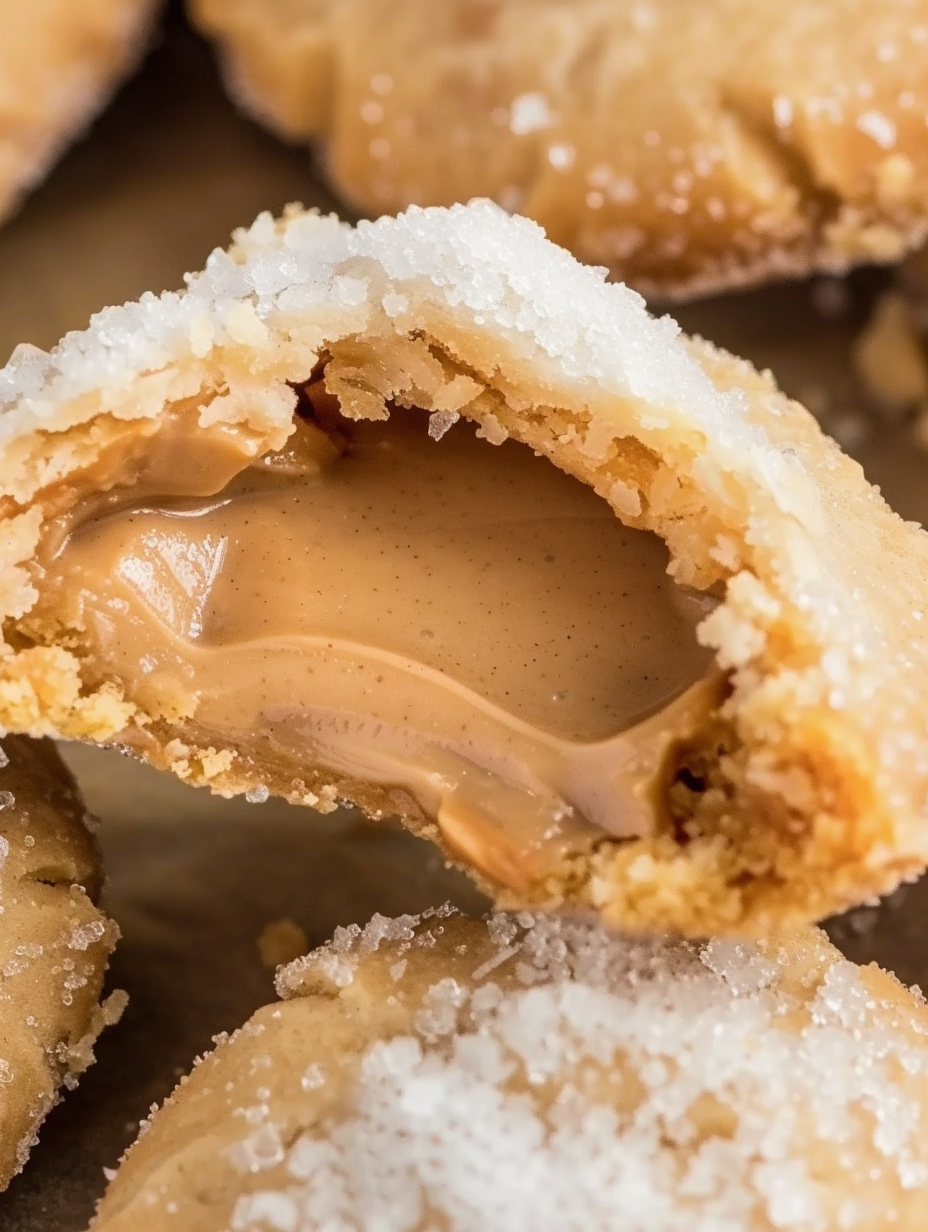
Warm, buttery pockets of pie crust filled with molten peanut butter—simple, nostalgic, and irresistibly gooey.
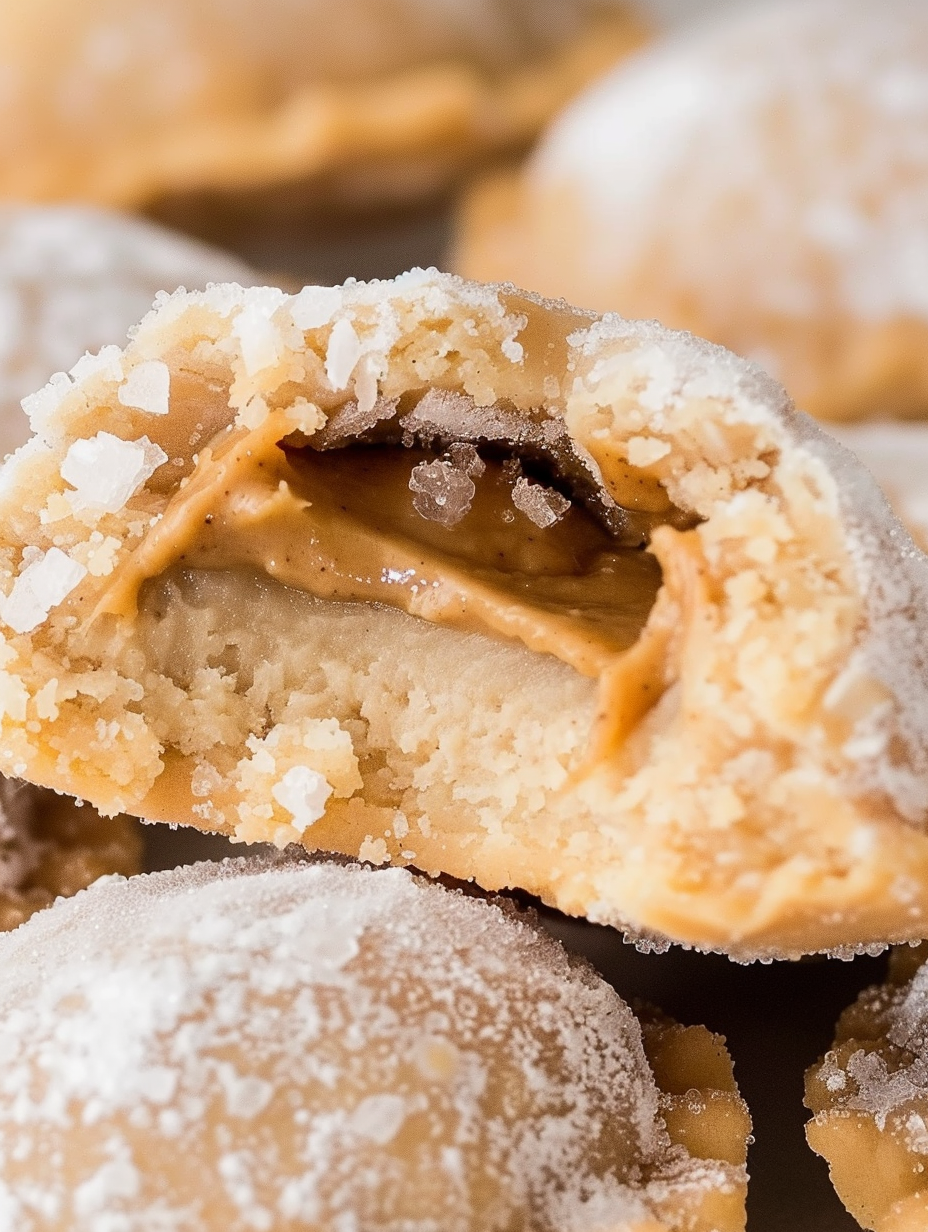
This recipe for Peanut Butter Lava Cookies has been my go-to treat when I want something ridiculously comforting with almost no effort. I discovered this technique years ago when a can of refrigerated pie crust met a lingering jar of peanut butter on a busy weeknight, and the result was so magically molten that my partner declared them "official happiness cookies." They are deceptively simple: crisp, delicate pastry on the outside and a molten, oozy peanut butter center that begs to be eaten while still warm.
These cookies matter because they capture the joy of nostalgic flavors—rich peanut butter and buttery pastry—without the long chilling times of traditional cookie dough. Bite into one straight from the oven and you’ll find a warm, flowing center that firms up as it cools, giving two delightful textures in each mouthful. I first served these at a casual family brunch, and watching my nieces tentatively poke the center and then light up when it spilled out taught me that some of the best dishes are born from pantry improvisation.
From my experience, these are the kind of cookies people ask about repeatedly. At a neighborhood potluck, someone grabbed three before they'd even cooled; at home, they became my partner's comfort food after a long day. I love how a humble jar of JIF turns into molten gold inside a flaky shell—small pleasures like this make baking feel effortless and joyful.
I love the immediacy of this recipe: a few minutes of prep turns into something ceremonious and warm. Family members who usually pass on sweets have come back for seconds, and I’ve learned that patience at the cooling stage is key to avoid burned tongues—hot lava is joyful, but it’s also very hot.
Store cooled cookies in an airtight container at room temperature for up to 2 days; beyond that, refrigerate to maintain quality. If refrigerated, place parchment between layers to prevent sticking and bring cookies to room temperature or warm them at 300°F for 4–6 minutes before serving to restore the lava center. For longer storage, freeze baked cookies on a sheet until firm, then transfer to freezer-safe bags for up to 3 months. When reheating from frozen, give an extra minute or two in the oven and watch closely to avoid over-softening the crust.
If you’re avoiding dairy, look for dairy-free refrigerated crusts made with vegetable shortening instead of butter—texture will be slightly different but still delicious. For a different flavor profile, try chocolate-hazelnut spread in place of peanut butter (reduce sugar sprinkle if the spread is very sweet). Crunchy peanut butter will yield a slightly less molten center and more texture inside; use it if you want more bite. To make them lower-sugar, swap superfine sugar for a granular sweetener substitute in the coating—expect a milder caramelized edge.
Serve warm with a dusting of powdered sugar or a pinch of flaky sea salt to heighten the flavor contrast. These pair beautifully with a scoop of vanilla ice cream or a dollop of whipped cream for an easy a la mode option. For brunch, plate with fresh berries and a drizzle of honey. For an elegant dessert plate, garnish with toasted peanuts and a small quenelle of salted caramel.
While molten-style desserts are often associated with chocolate lava cakes from French-influenced pastry, these peanut butter pockets are a distinctly American riff—taking pantry staples and turning them into an instant celebration. Peanut butter has deep roots in American home cooking and comfort food culture; combining it with flaky pastry reflects the tradition of simple ingenuity in home baking, a hallmark of Midwestern and Southern kitchens where both peanut butter and refrigerated dough are beloved staples.
In winter, add a pinch of cinnamon or nutmeg to the sugar coating for warming notes. During summer, serve slightly cooled with a scoop of frozen yogurt to contrast the warm center. For holidays, press a small holiday-shaped cutout on top before baking or sprinkle colored sanding sugar for festive flair. For autumn, fold in a teaspoon of pumpkin spice into the peanut butter filling for a seasonal twist.
Assemble sealed rounds on a sheet tray and refrigerate for up to 24 hours; bake directly from chilled, adding 1–2 minutes to the bake time. If you prefer to freeze before baking, freeze assembled cookies on the tray until solid, then store in a freezer bag and bake from frozen—add 3–4 minutes. Portion peanut butter into tablespoon scoops ahead of time using a small cookie scoop to speed assembly during busy moments.
These cookies are a reminder that delicious things don’t have to be complicated. With just three main ingredients you’ll get flaky pastry and molten peanut butter in under half an hour—perfect for sharing or savoring alone with a cup of coffee. Try them, tweak them, and make them your own.
Use creamy, stable peanut butter like JIF for the best molten texture; natural peanut butter can be oilier and runnier when hot.
Make sure the sealing edge is clean and dry; any peanut butter on the edge can prevent a tight seal and cause leaks.
Don’t overbake—removal at the first hint of golden edges yields the ideal molten center.
If you want an extra contrast, sprinkle flaky sea salt on the warm cookies just before serving.
This nourishing peanut butter lava cookies recipe is sure to be a staple in your kitchen. Enjoy every moist, high protein slice — it is perfect for breakfast or as a wholesome snack any time.
Yes—assemble and refrigerate sealed cookies for up to 24 hours; bake from chilled, adding 1–2 minutes to the time.
They freeze well. Flash-freeze on a tray then transfer to a sealed bag for up to 3 months. Bake from frozen and add a few extra minutes.
This Peanut Butter Lava Cookies recipe makes perfectly juicy, tender, and flavorful steak every time! Serve with potatoes and a side salad for an unforgettable dinner in under 30 minutes.
Preheat oven to 400°F (204°C). Line a baking sheet with parchment paper and bring pie crusts to room temperature per package instructions for easier rolling and cutting.
On parchment, unroll one crust and roll slightly thinner (about 1/16"–1/8"). Use a 3-inch cutter to cut rounds; reroll scraps to maximize yield.
Place 1 tablespoon of creamy peanut butter in the center of each round and sprinkle 1/8 teaspoon granulated sugar over the peanut butter to prevent sealing issues.
Top with a second round and press edges firmly to seal. Crimp with a fork if desired. Ensure edges are clean and dry to avoid leaks.
Toss each sealed cookie lightly in granulated sugar and arrange on the prepared sheet. Bake 12 minutes until edges just begin to brown; do not overbake.
Remove from oven and rest on the baking sheet for 2 minutes. Serve warm, being cautious—peanut butter lava is very hot initially and firms up as it cools.
Last Step: Please leave a rating and comment letting us know how you liked this recipe! This helps our business to thrive and continue providing free, high-quality recipes for you.
Leave a comment & rating below or tag
@yummique on social media!

Tender grilled zucchini wraps basil ricotta, bathed in marinara and mozzarella, baking into a bubbly, lighter Italian comfort dinner ready in 30 minutes.

Crisp-edged, tender-in-the-middle zucchini and yellow squash made in 15 minutes with pantry spices. A vibrant, veggie-forward side everyone devours.

Tender chicken meatballs simmered in rich marinara and blanketed with melty mozzarella, bringing all the flavors of chicken parm in cozy, bite-sized form.
Leave a comment & rating below or tag @yummique on social media!
Enjoyed this recipe? Share it with friends and family, and don't forget to leave a review!
This recipe looks amazing! Can't wait to try it.
Comments are stored locally in your browser. Server comments are displayed alongside your local comments.

Join to receive our email series which contains a round-up of some of our quick and easy family favorite recipes.
